The Challenges of On-Premises Certificate Management
Managing on-premises Certificate Authorities (CAs) has become increasingly challenging in today’s IT environment. Traditional systems demand extensive hardware, software, and administrative resources to ensure high availability and security. As organizations shift toward hybrid and cloud-first strategies, extending certificate services to remote devices adds complexity, often leading to inefficiencies and vulnerabilities. Maintaining these legacy systems can strain IT teams and limit their ability to address other critical business needs.
Intune’s Cloud Public Key Infrastructure (PKI) offers a modern solution by streamlining certificate management through Microsoft’s trusted cloud infrastructure. This approach reduces overhead, enhances scalability, and improves security while simplifying certificate deployment across devices. By eliminating the need for physical hardware and complex configurations, Intune’s PKI empowers organizations to focus on their core objectives, making certificate provisioning efficient and secure.
Creating a Root CA in Cloud PKI
The first step in deploying Intune’s Cloud PKI is creating the Root and Issuing Certificate Authorities. When it comes to setting up the CA hierarchy, you can either BYOCA (Bring Your Own CA) or set up the Root CA directly within your Intune instance. For simplicity, we will be setting up the latter solution.
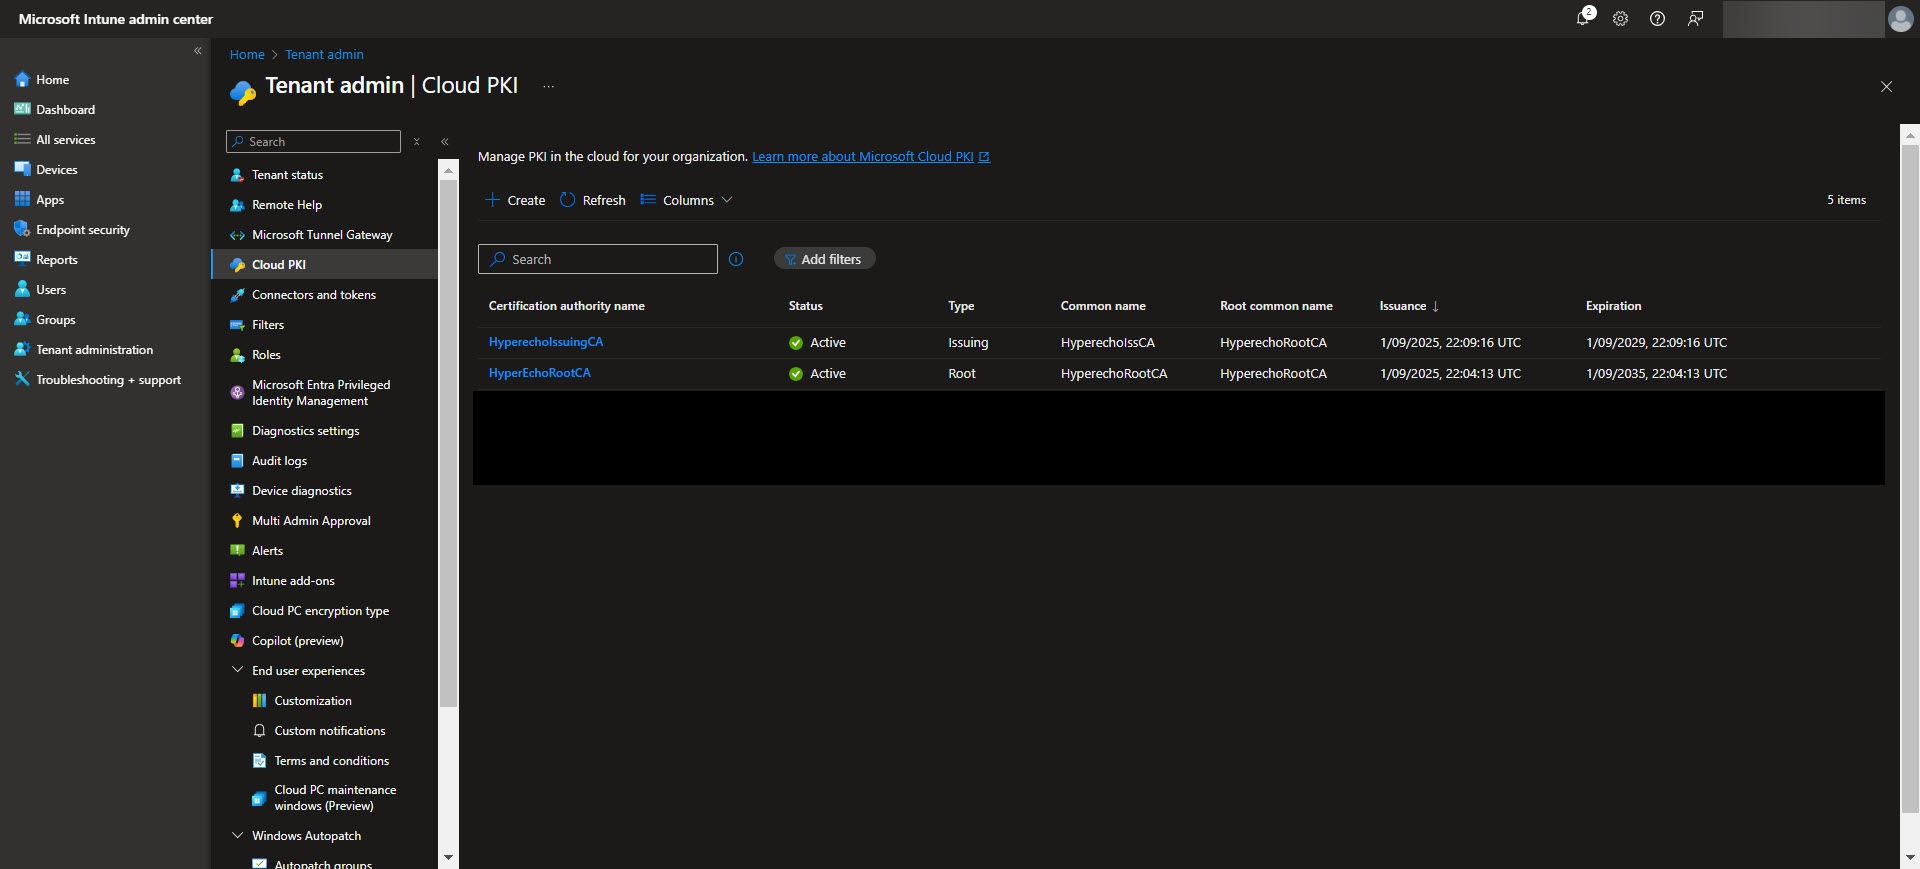
To begin, navigate to the Intune admin center and select Tenant Administration > Cloud PKI. From here, you can start configuring the Root Certificate Authority. Click on “Create” and select the Root CA option. Now specify the required settings such as certificate name, validity period, the extended key usage, and the subject attributes.
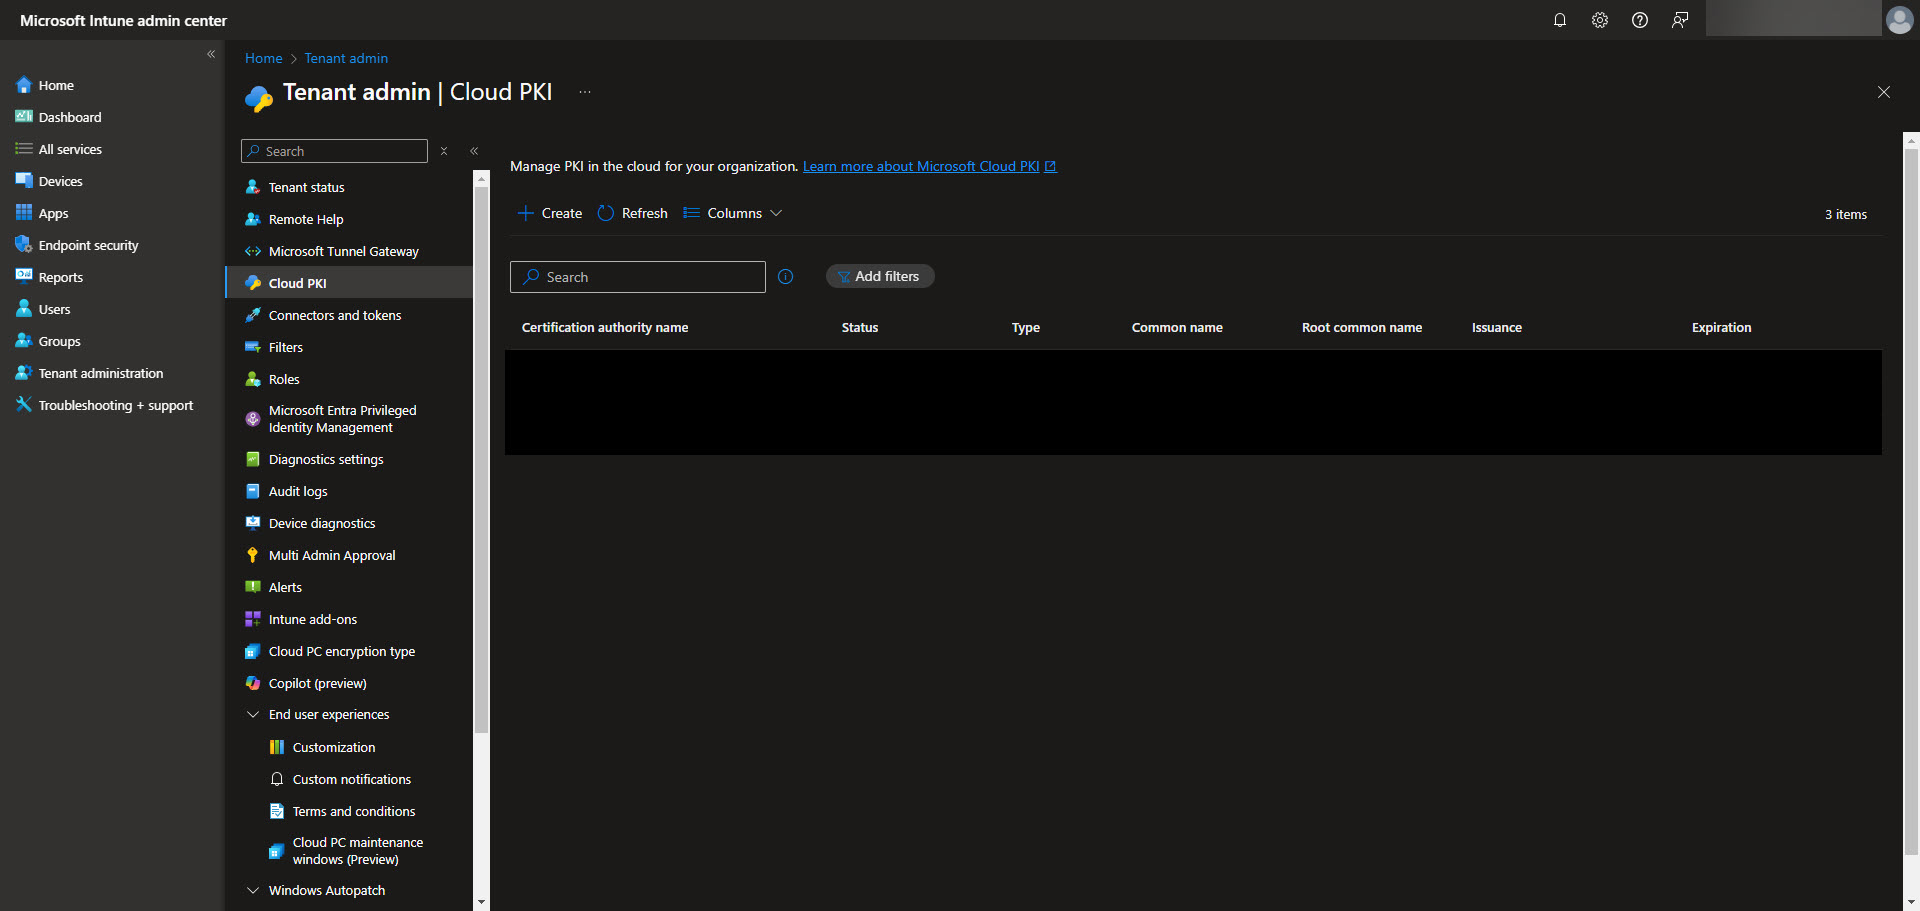
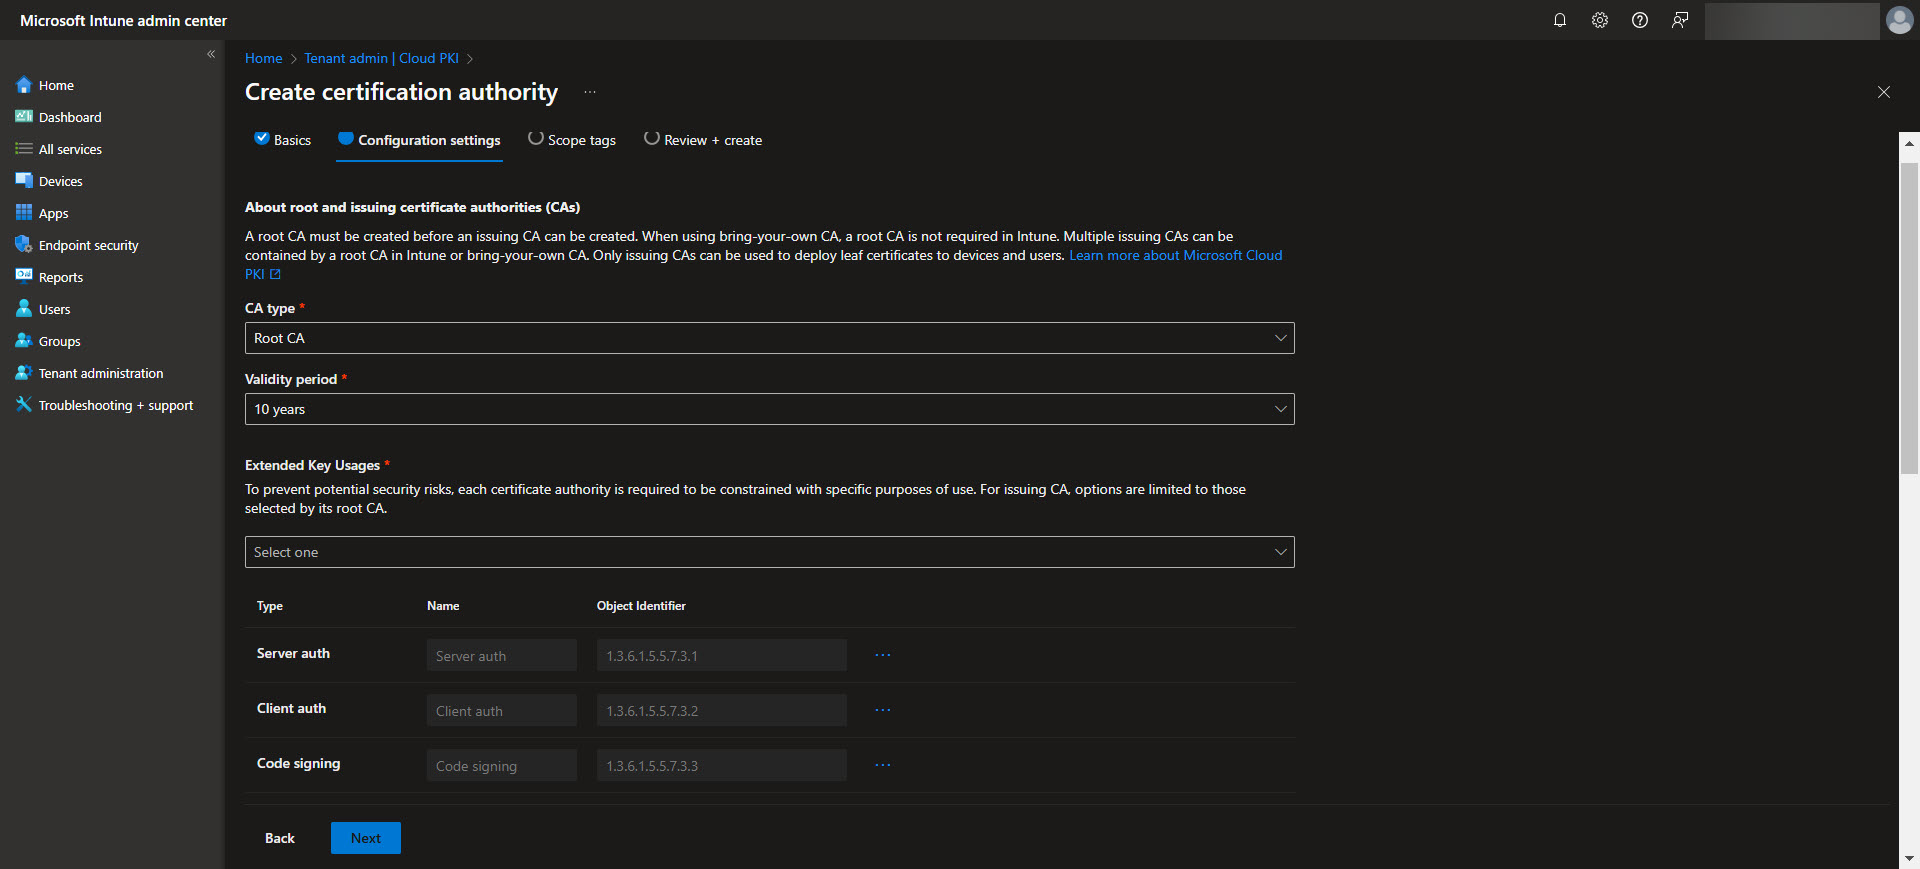
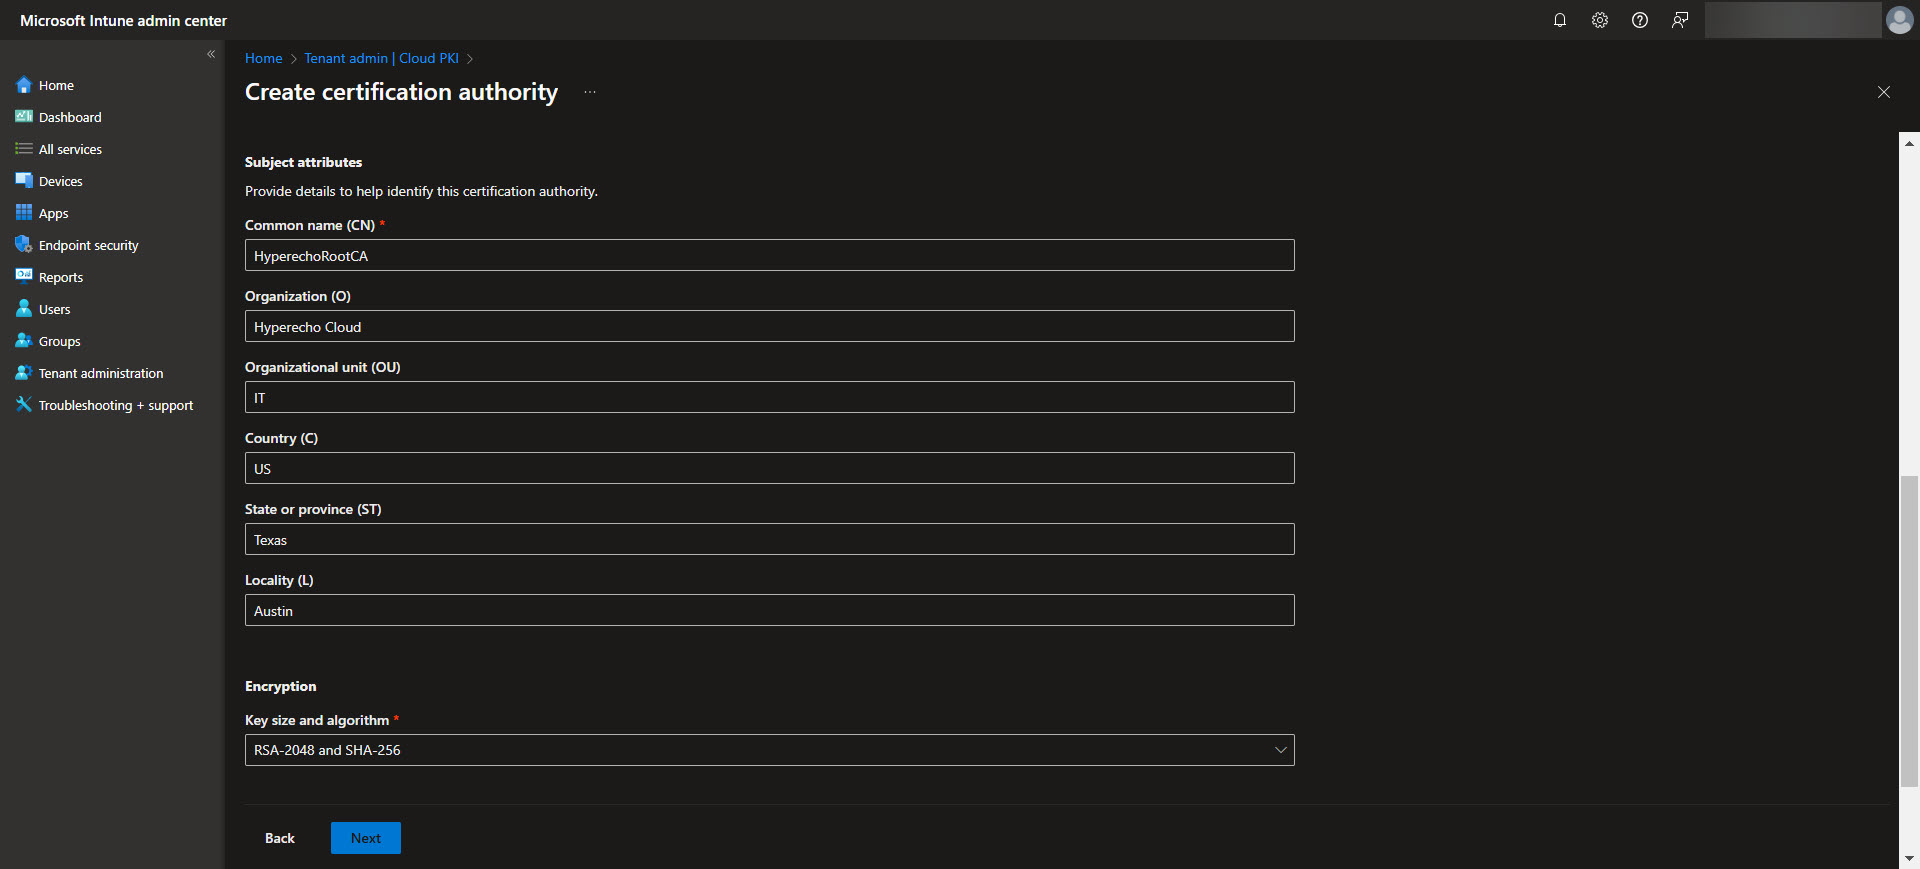
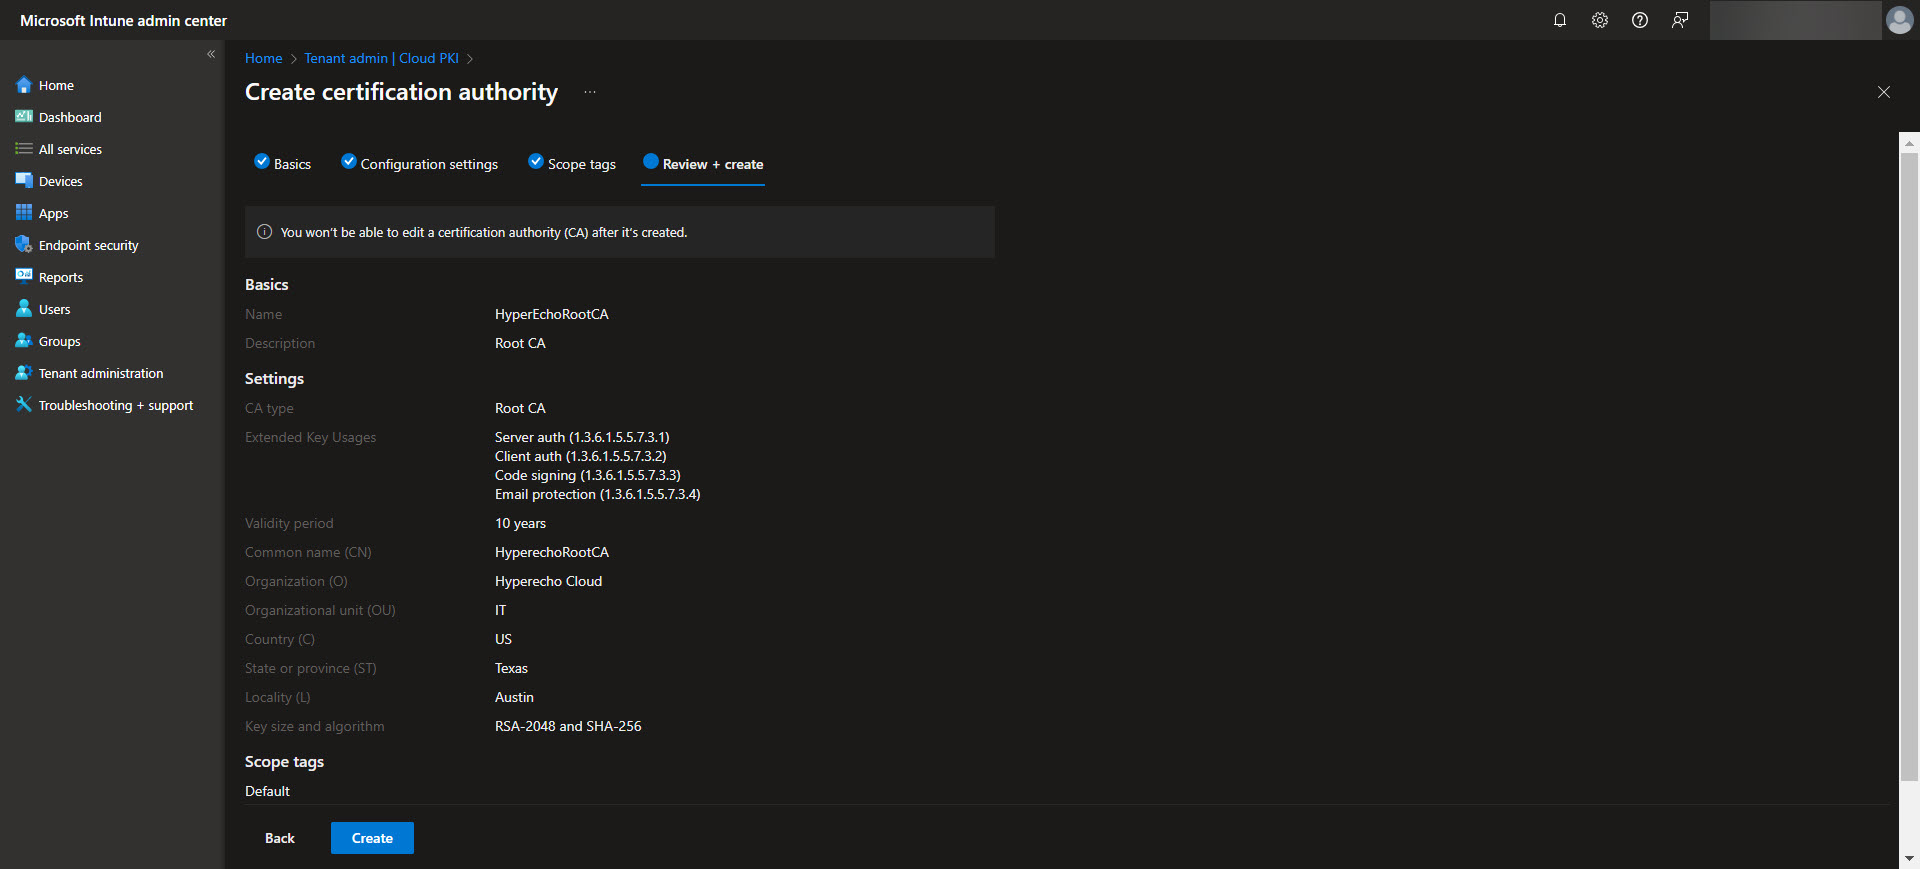
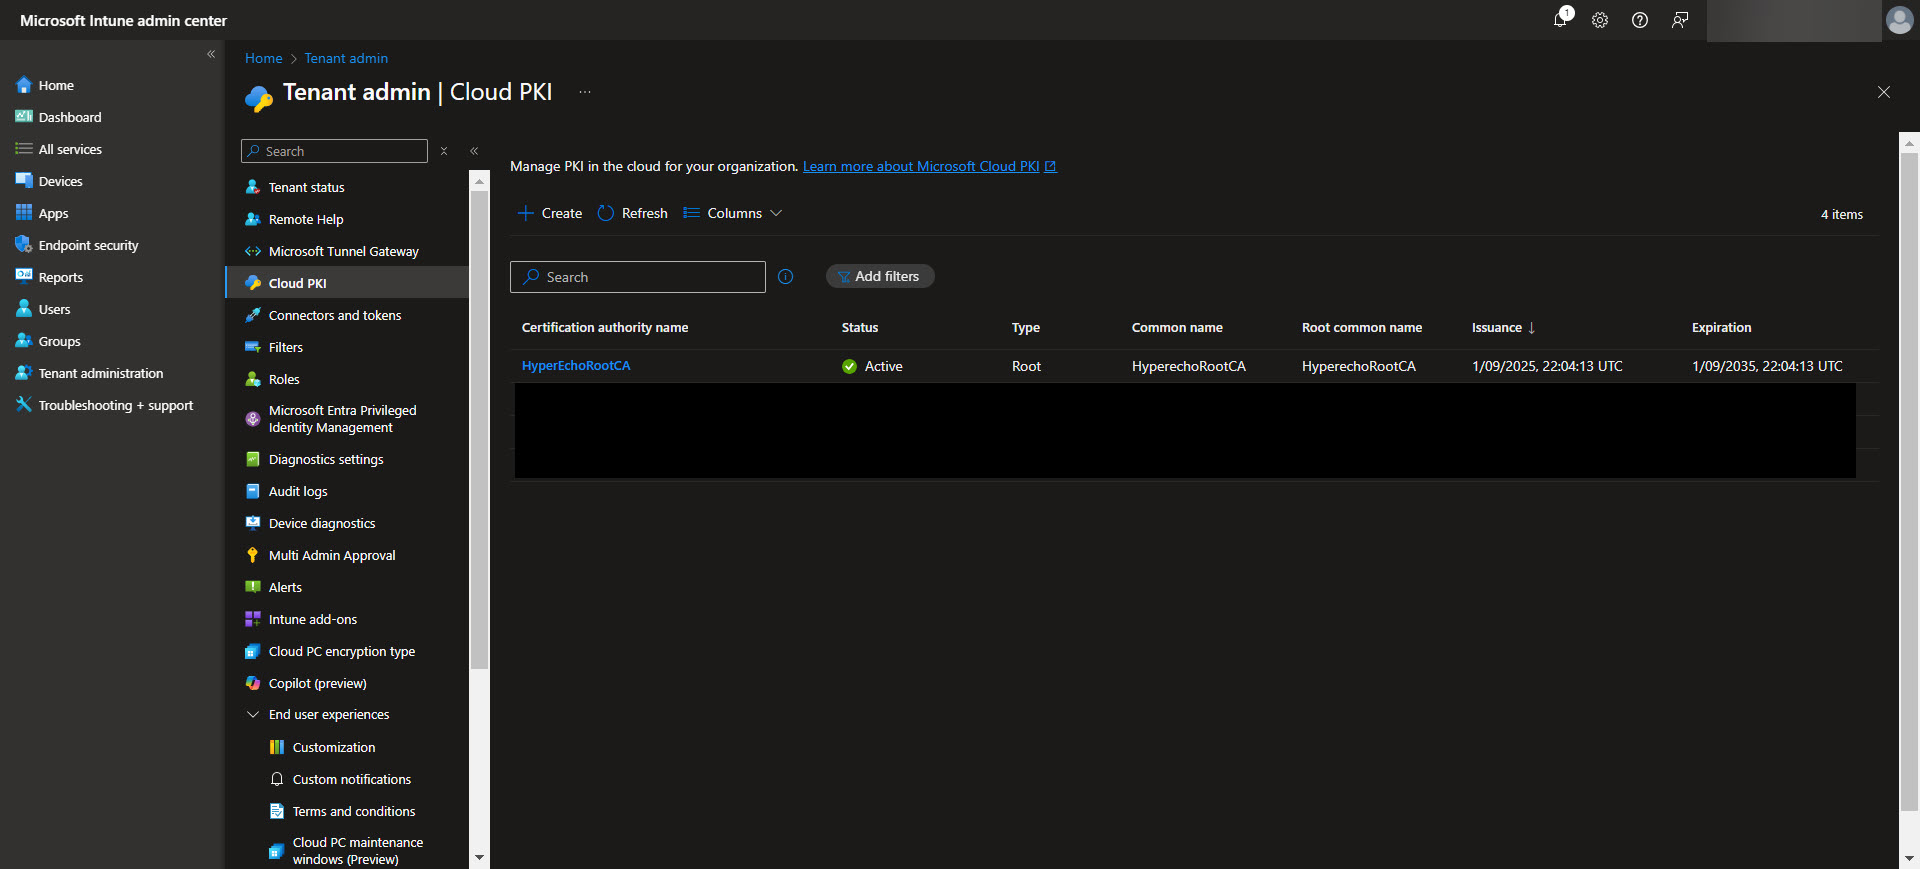
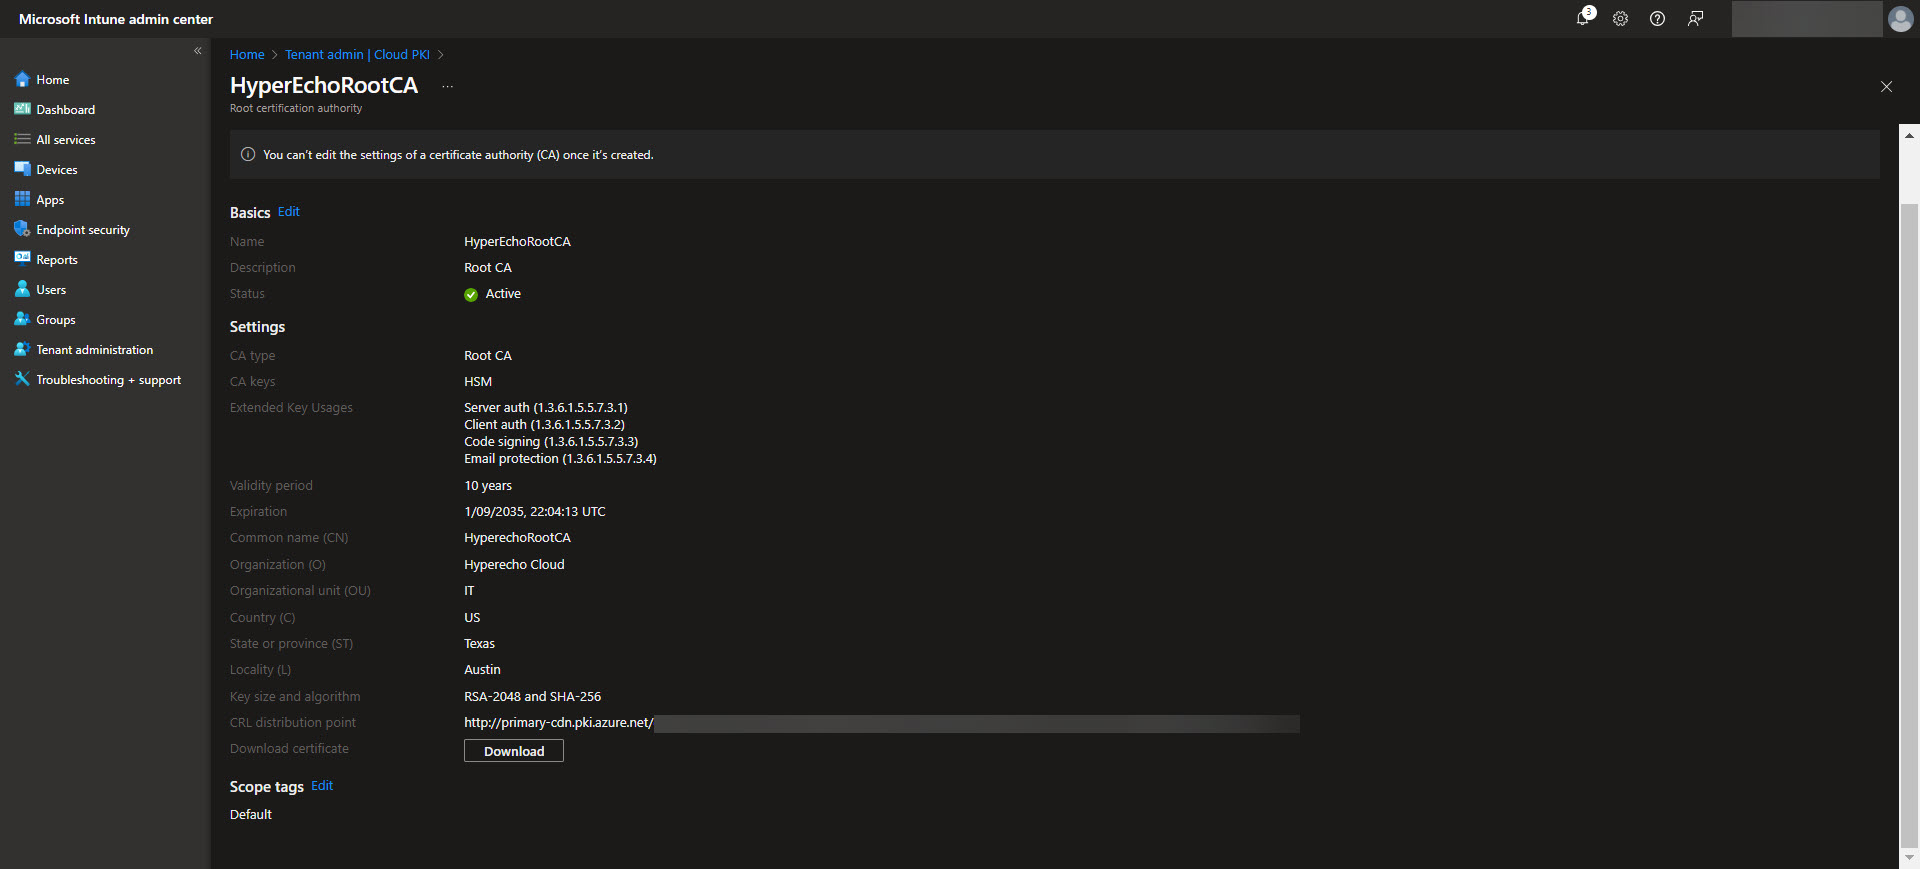
Make sure to include any EKU’s (Extended Key Usages) in the root CA that you are wanting to be made available to the issuing CA. Also keep in mind that Cloud PKI doesn’t support the “Any Purpose” EKU for their PKI’s. Once the Root CA is setup we will use it as the trust anchor for your PKI infrastructure. Once the CA is created select the CA and validate the Properties are what you are expecting. Make sure to download the Root CA from here as we will need it later.

Configuring an Issuing CA in Cloud PKI
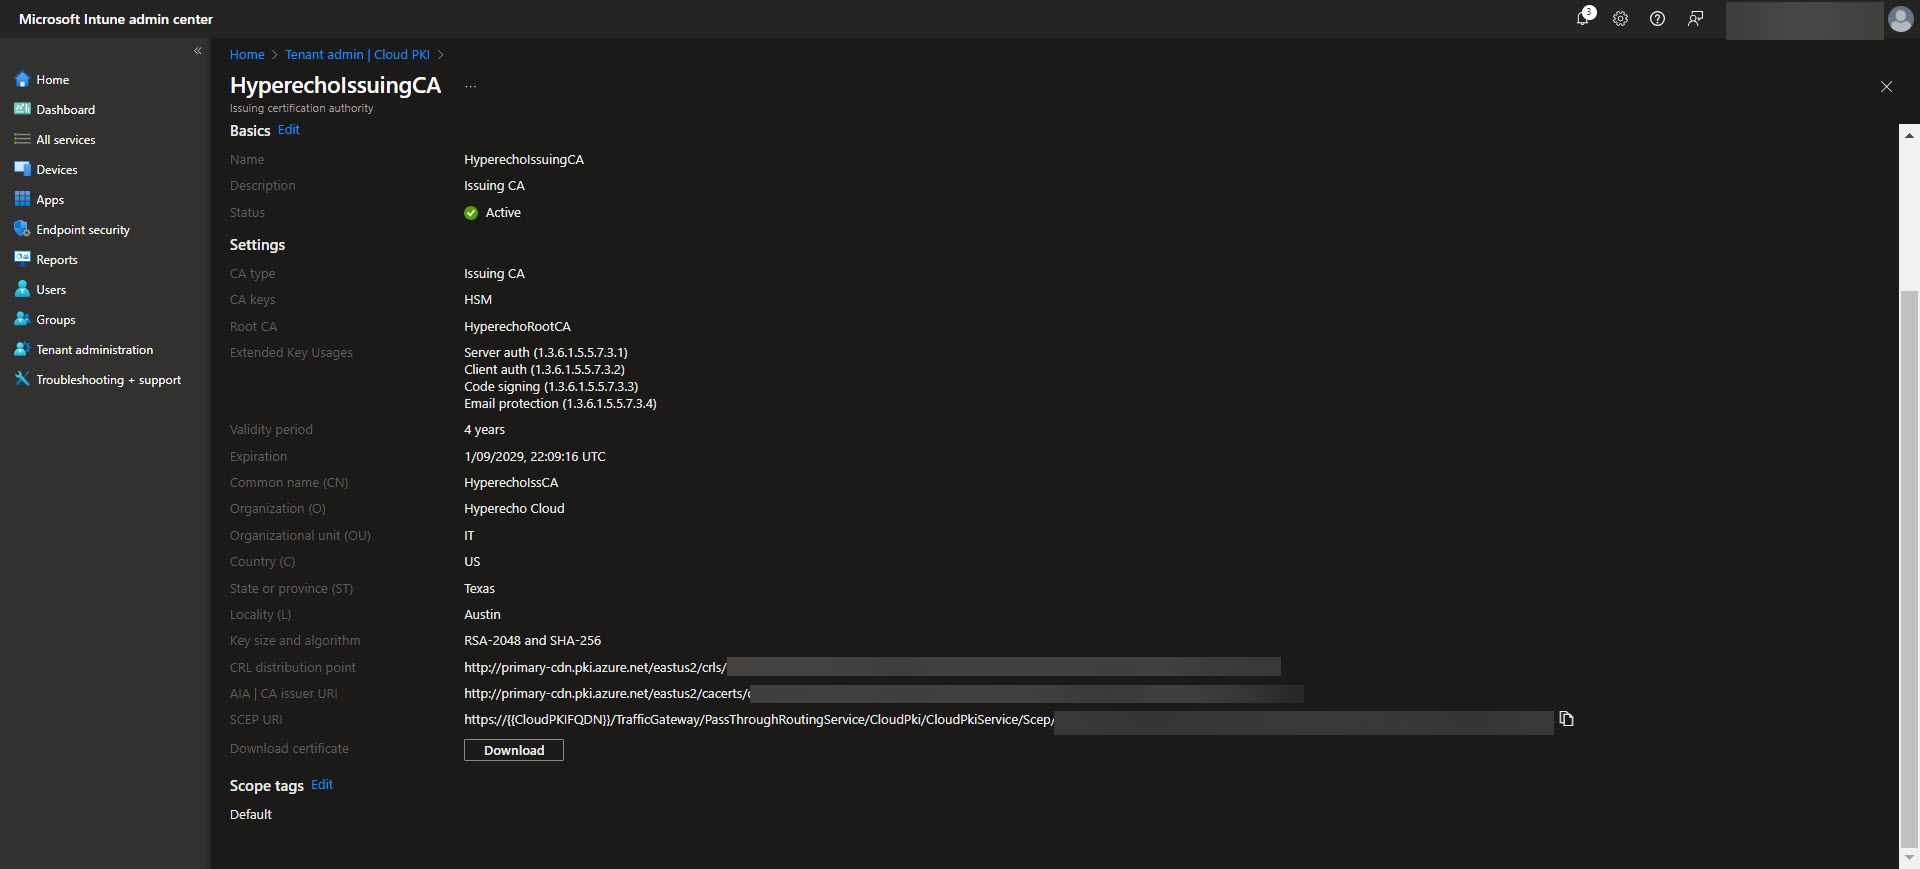
After establishing the Root CA, the next step is to configure the Issuing CA, which handles the actual certificate issuance for devices and users. In the Intune admin center, navigate back to Tenant Administration > Cloud PKI and select the option to create an Issuing CA. Provide a meaningful name for the Issuing CA and link it to the previously configured Root CA. Define the certificate template settings, including key usages, validity periods, and subject attributes specific to your organization’s needs. Ensure the Issuing CA is configured to include any EKUs required for the intended certificate purposes.

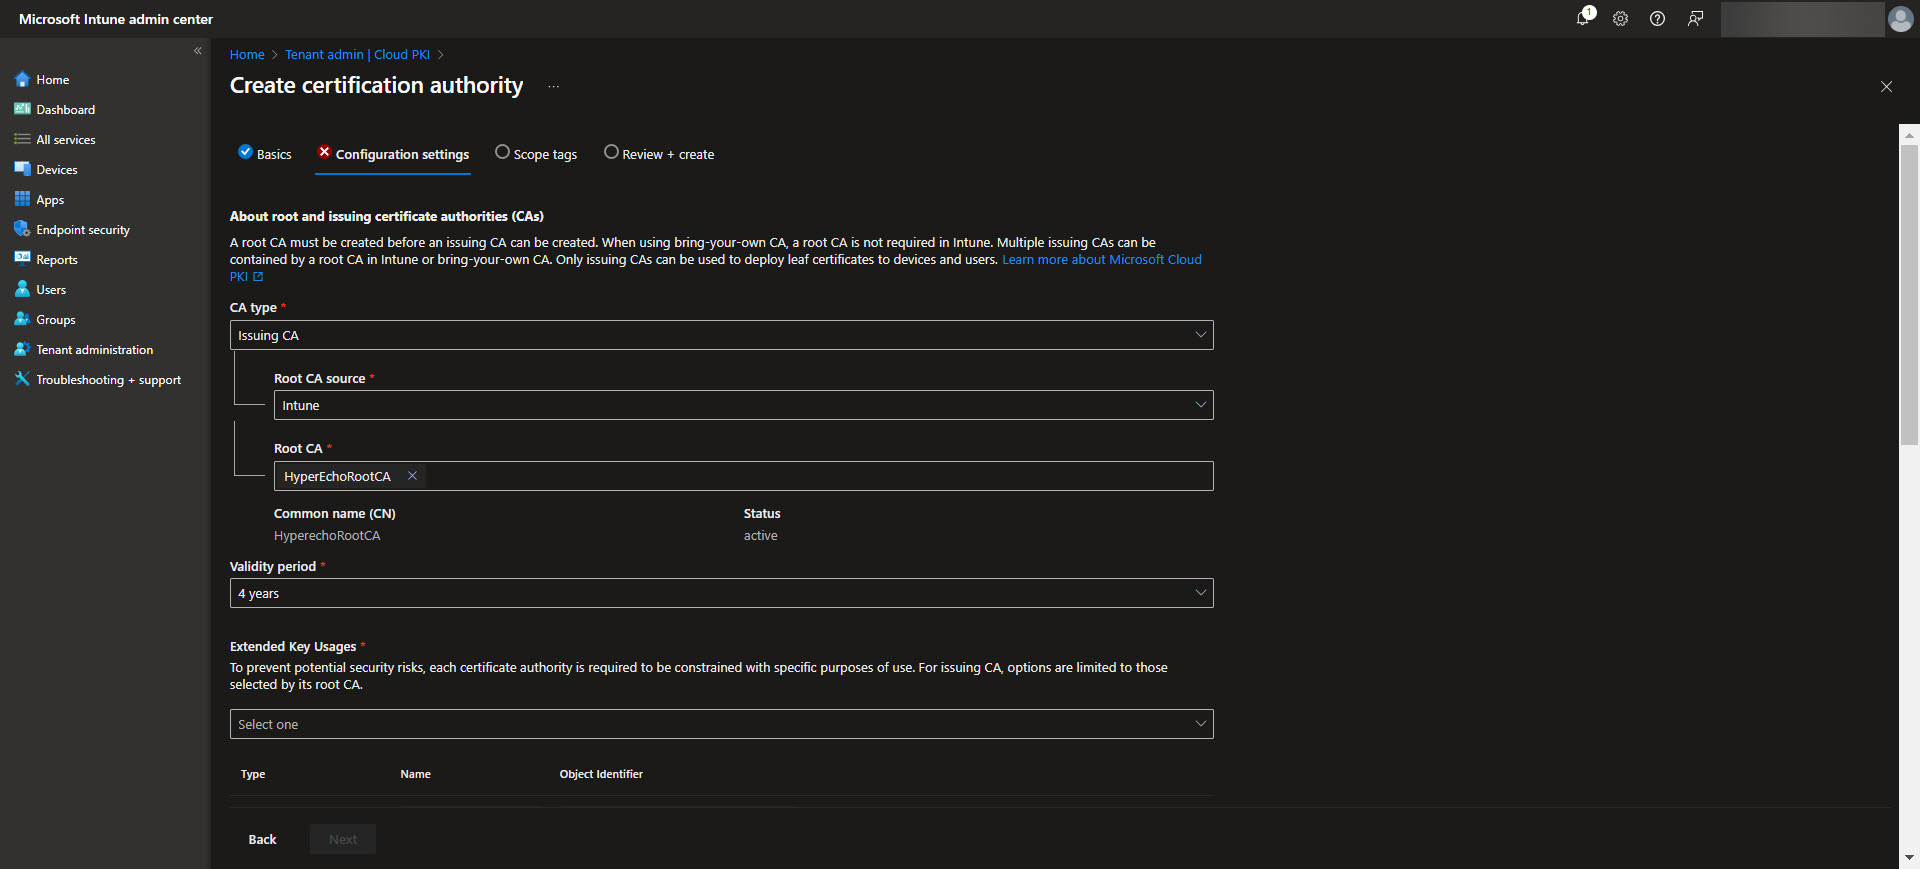
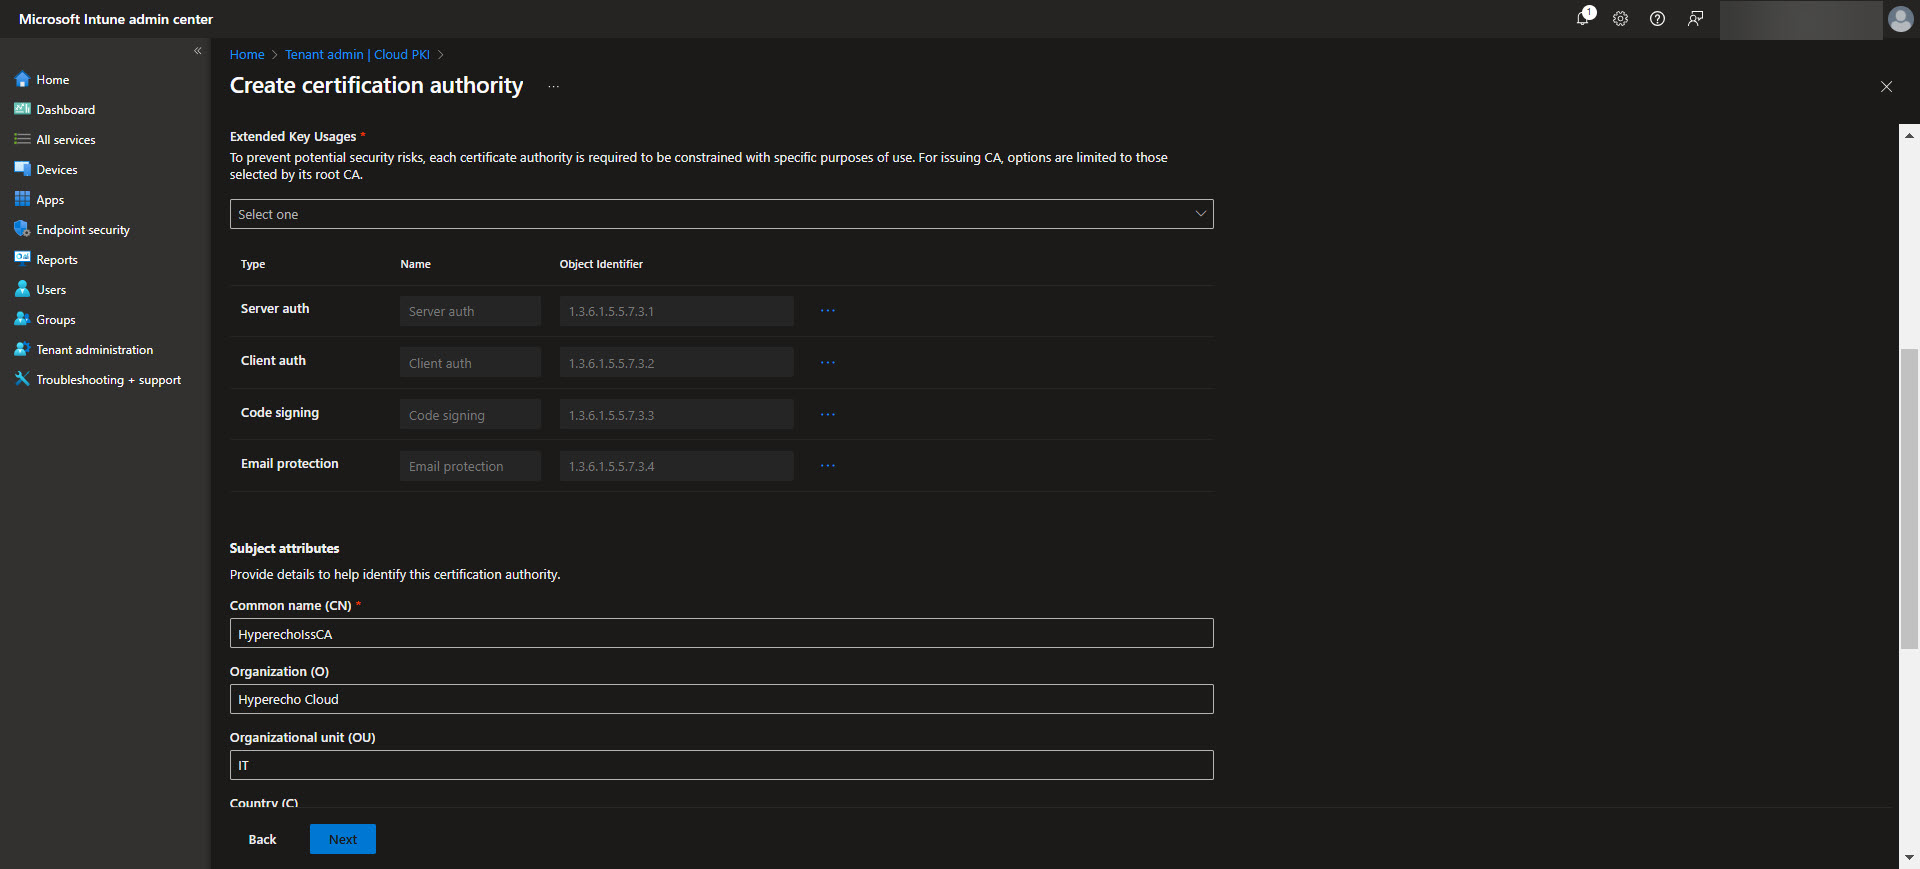
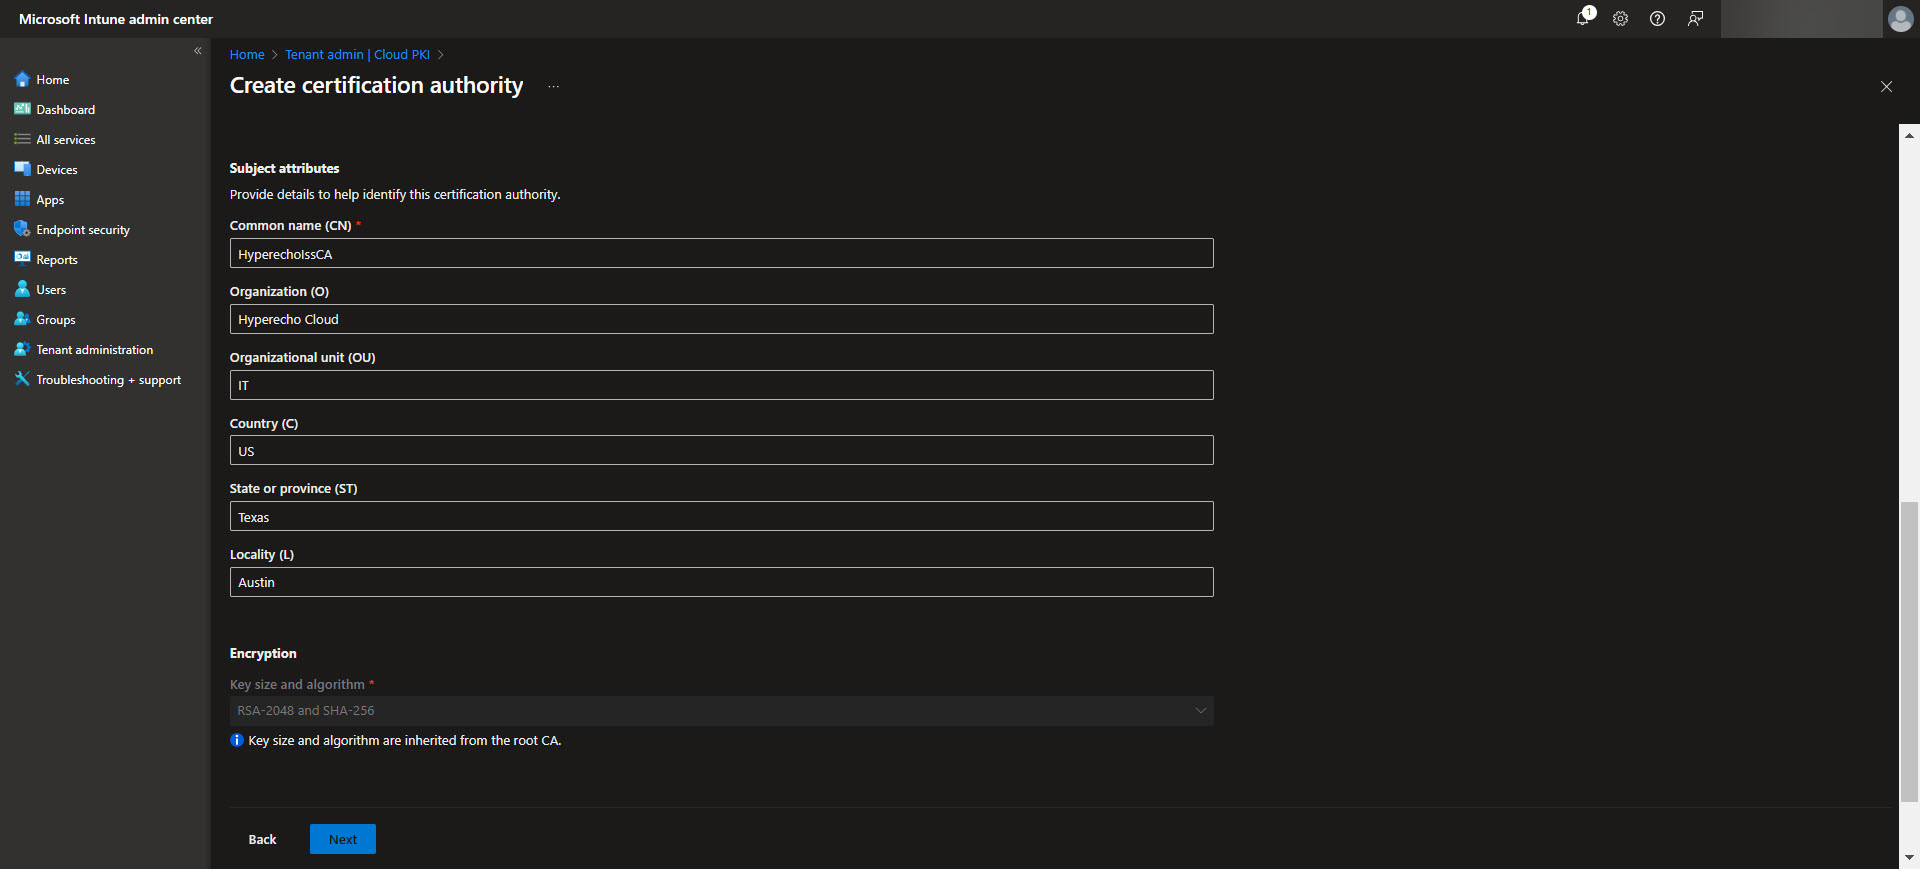
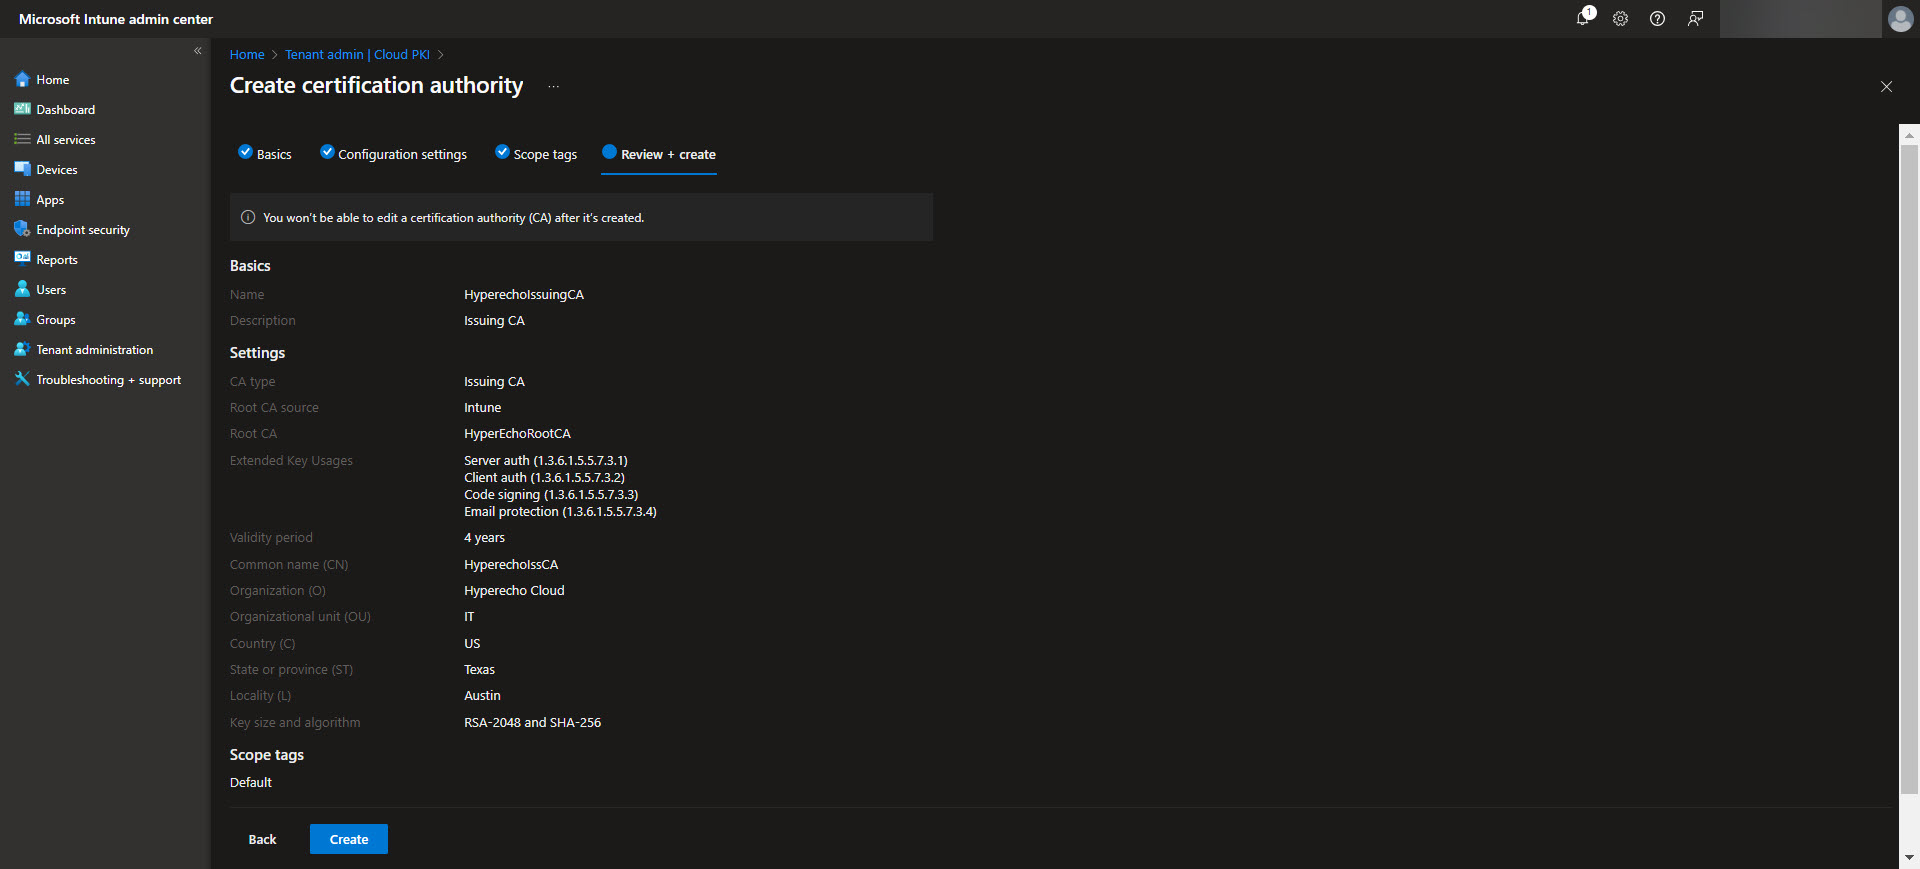
Once complete, the Issuing CA will be ready to distribute certificates based on the defined templates, streamlining secure certificate deployment across your device fleet. Again download the CA here for the next step.
Creating Windows Configuration Profiles for Trusted Certificates
Once the Root and Issuing CAs are configured, the next step is to deploy trusted certificates to Windows devices using Intune configuration profiles. Begin by navigating to the Intune admin center and selecting Devices > Configuration profiles > Create profile. Choose Windows 10 and later as the platform and select Trusted certificate as the profile type.
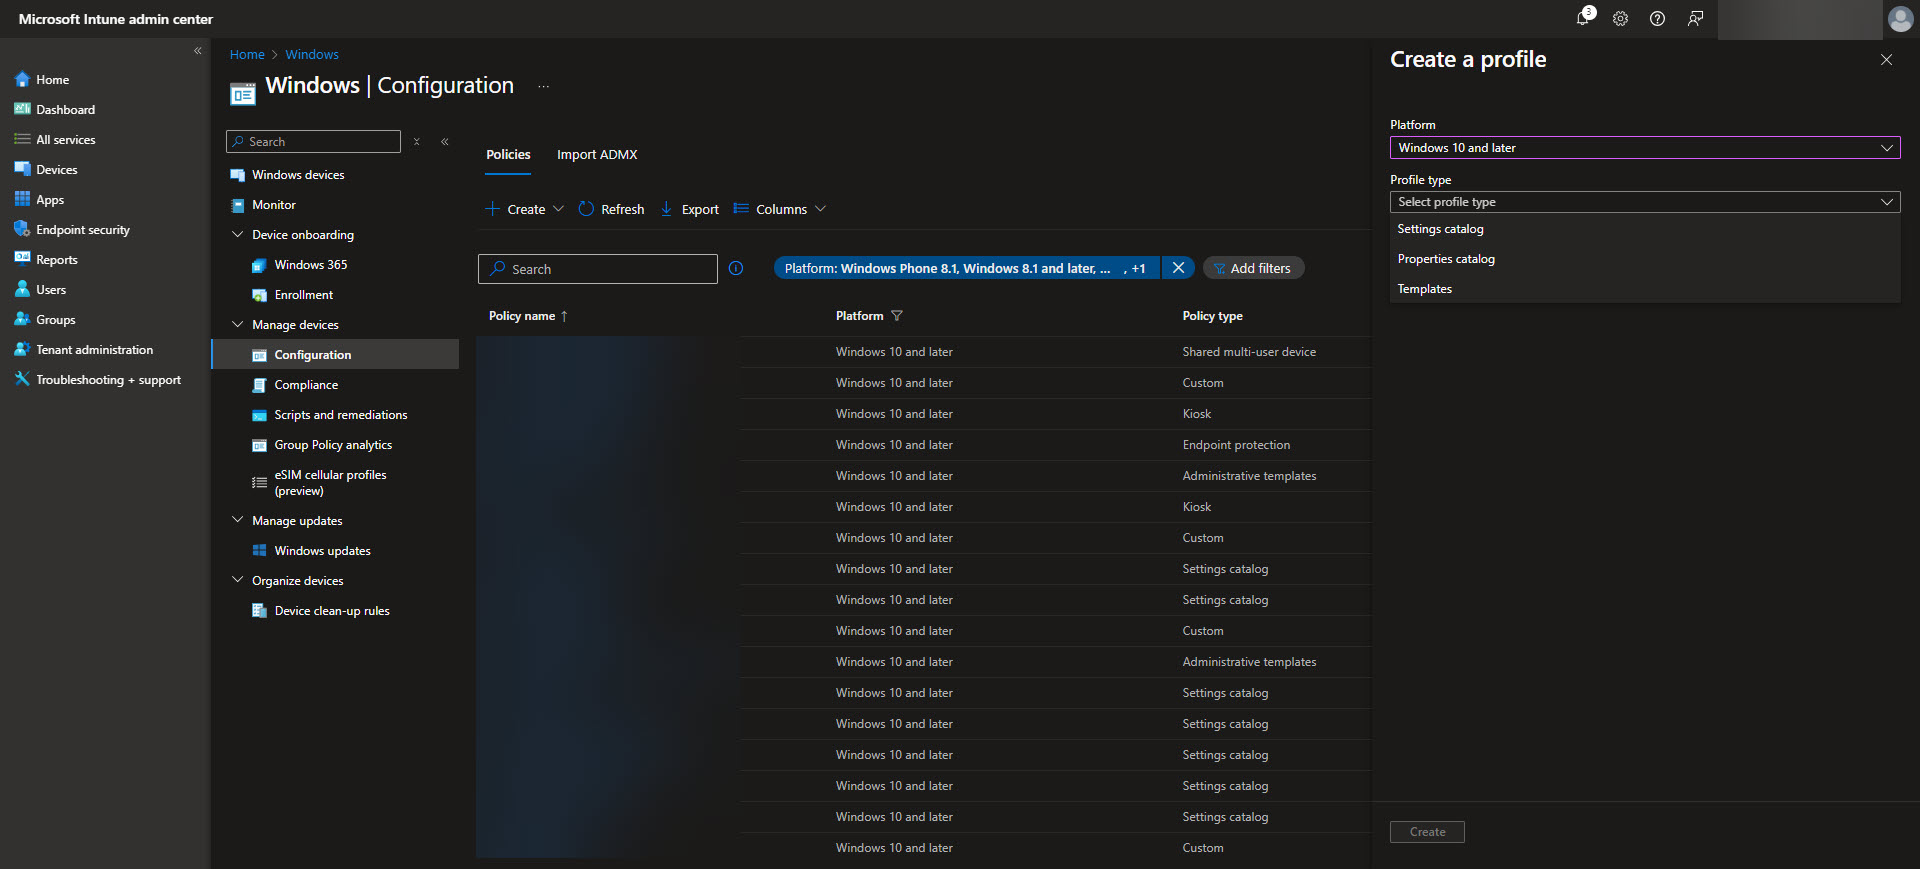
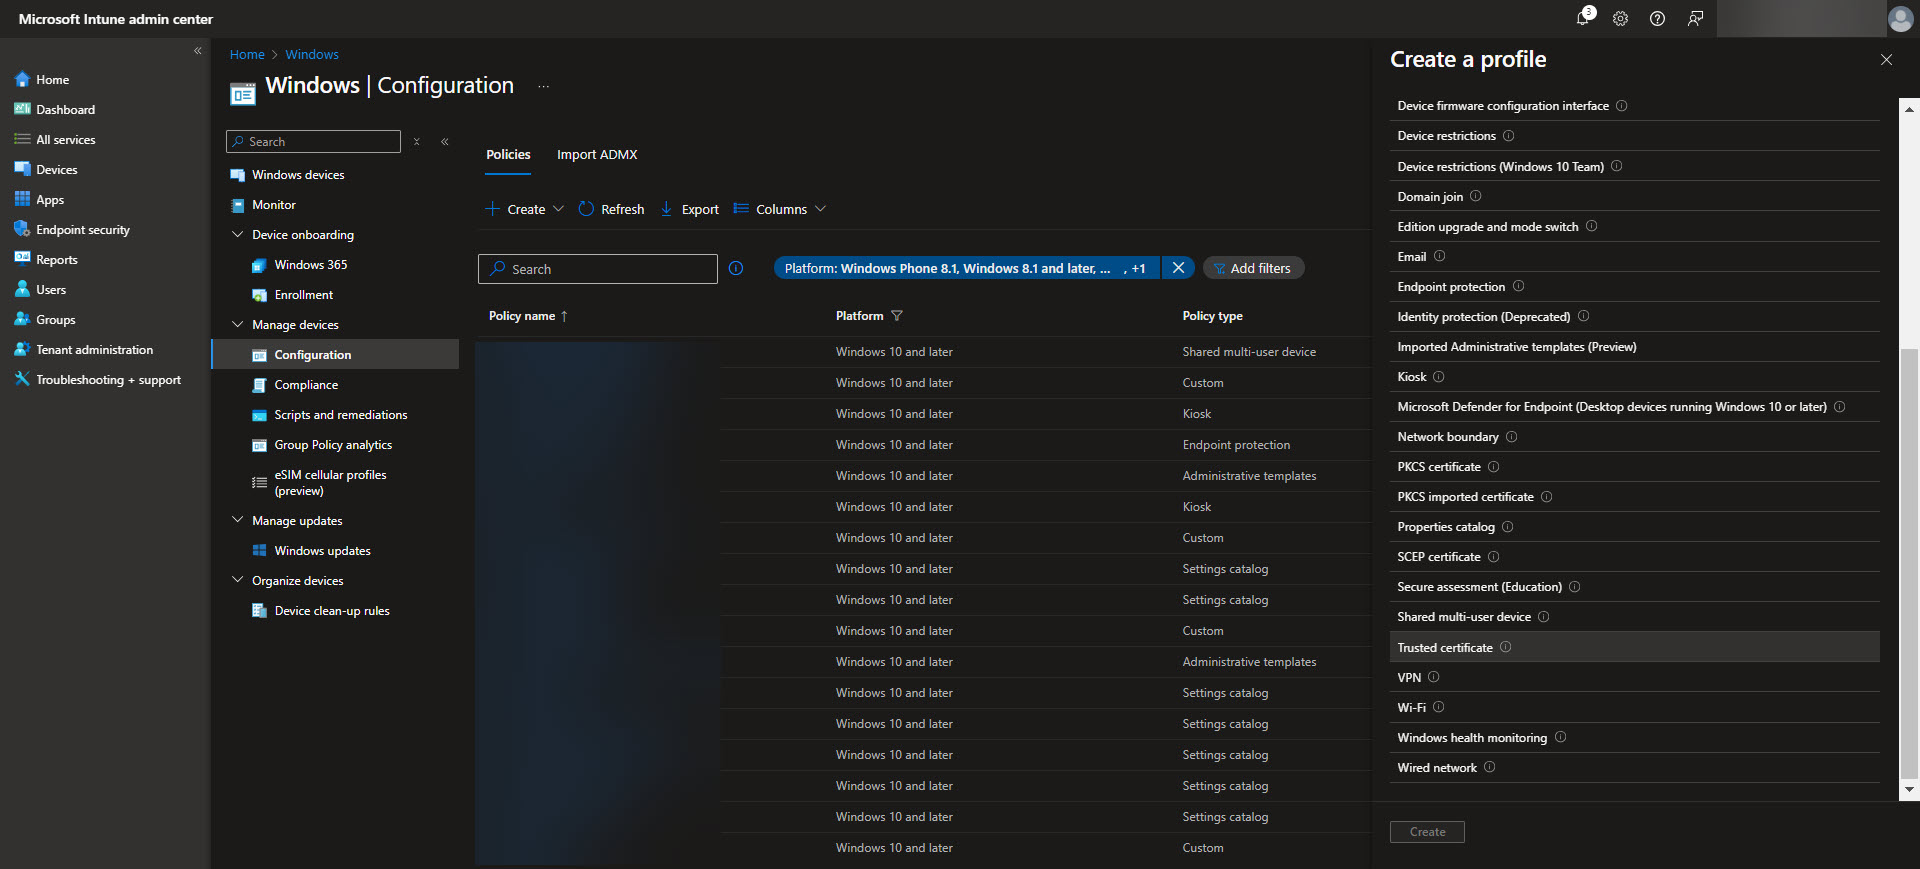
Create a profile for the Root CA first. Upload the Root CA’s certificate file (in .cer format) and assign the profile to the appropriate device groups. This ensures that all devices in the assigned groups trust the Root CA as a certificate authority. Once the proper assignment is completed hit the create button on the Review + Create tab.
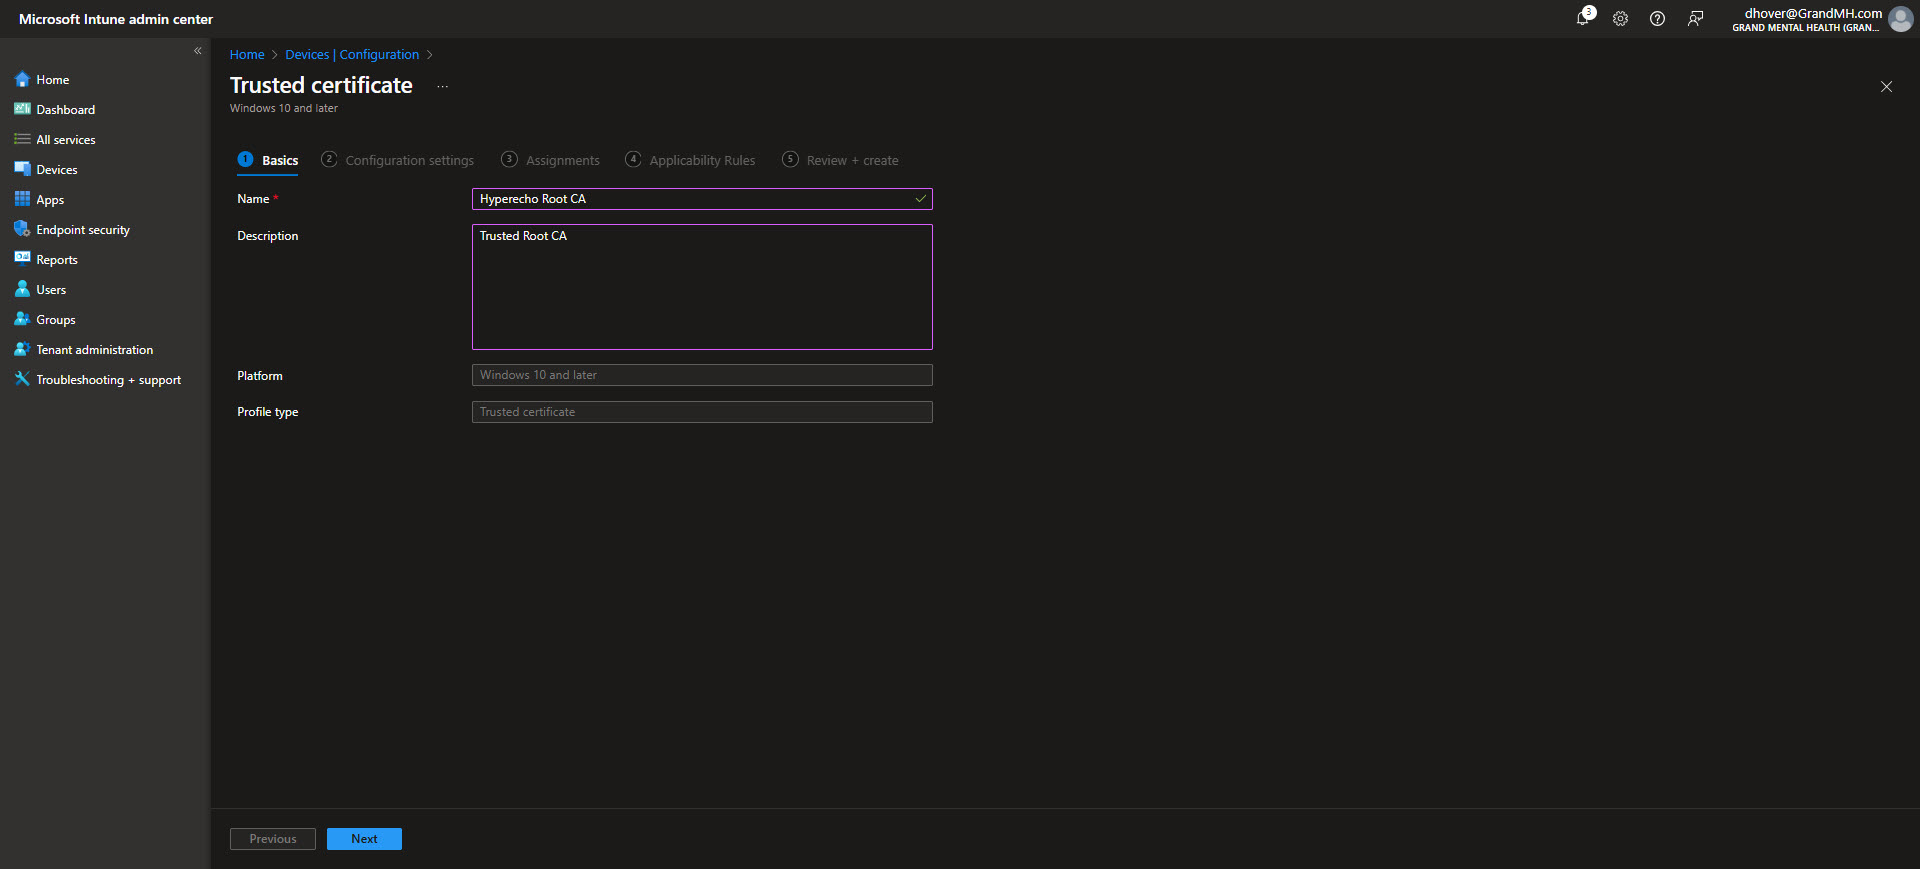
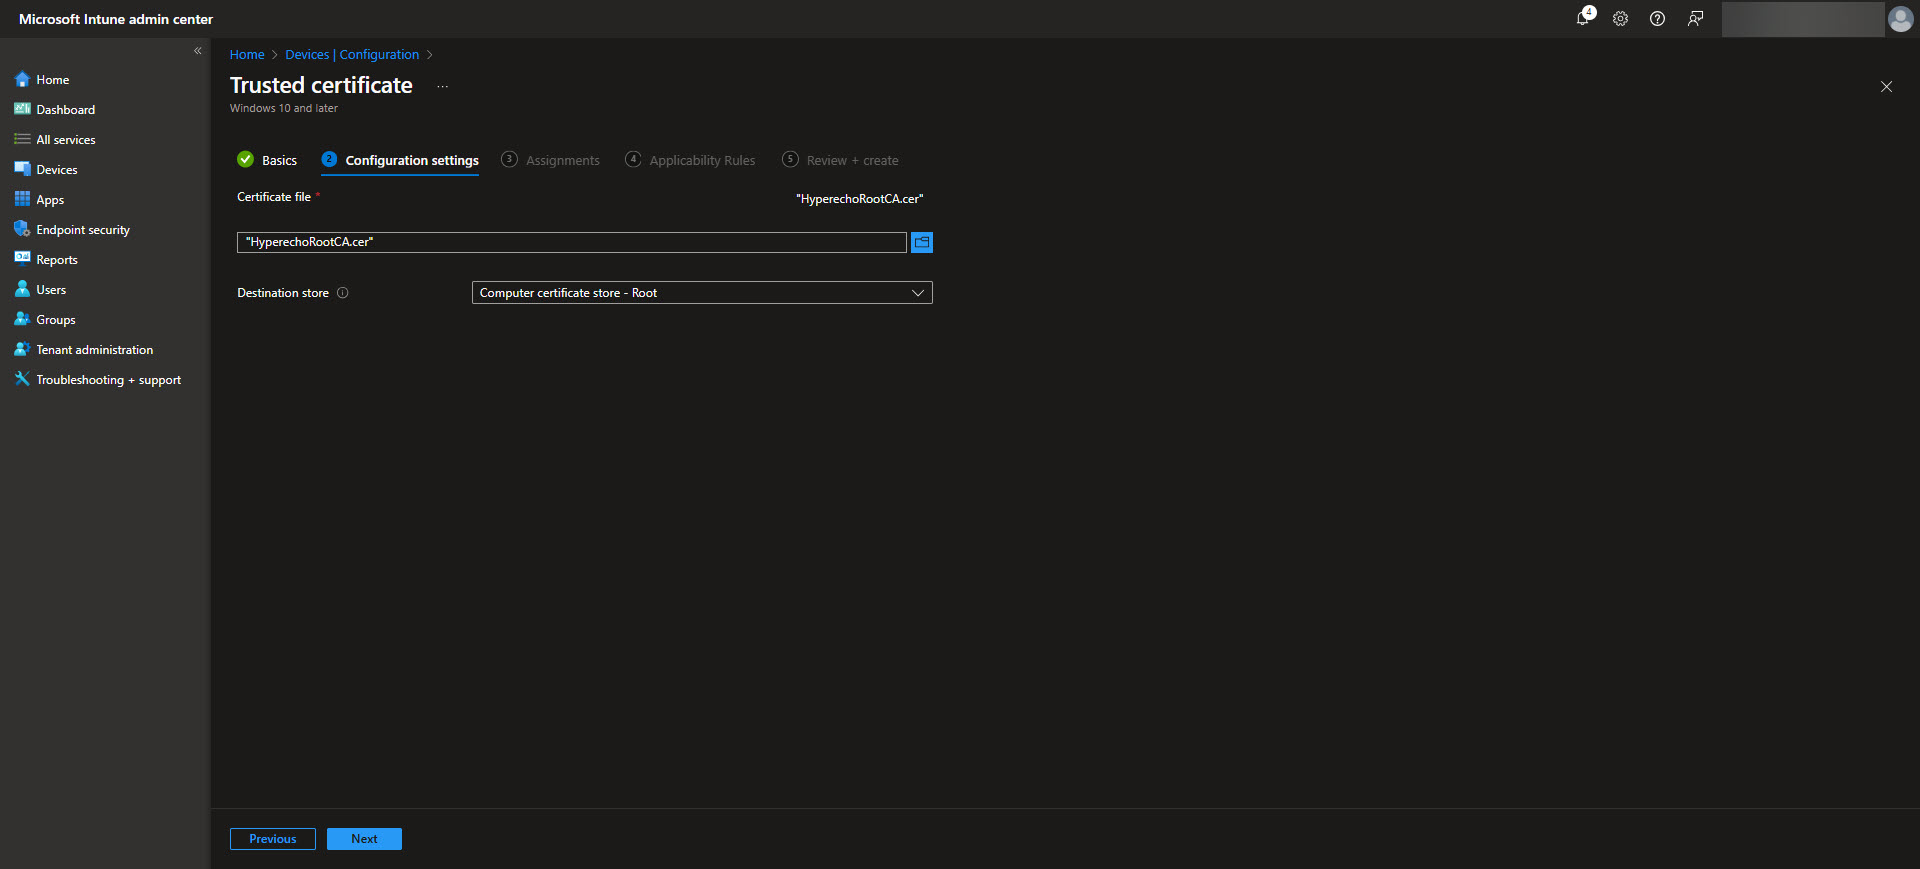
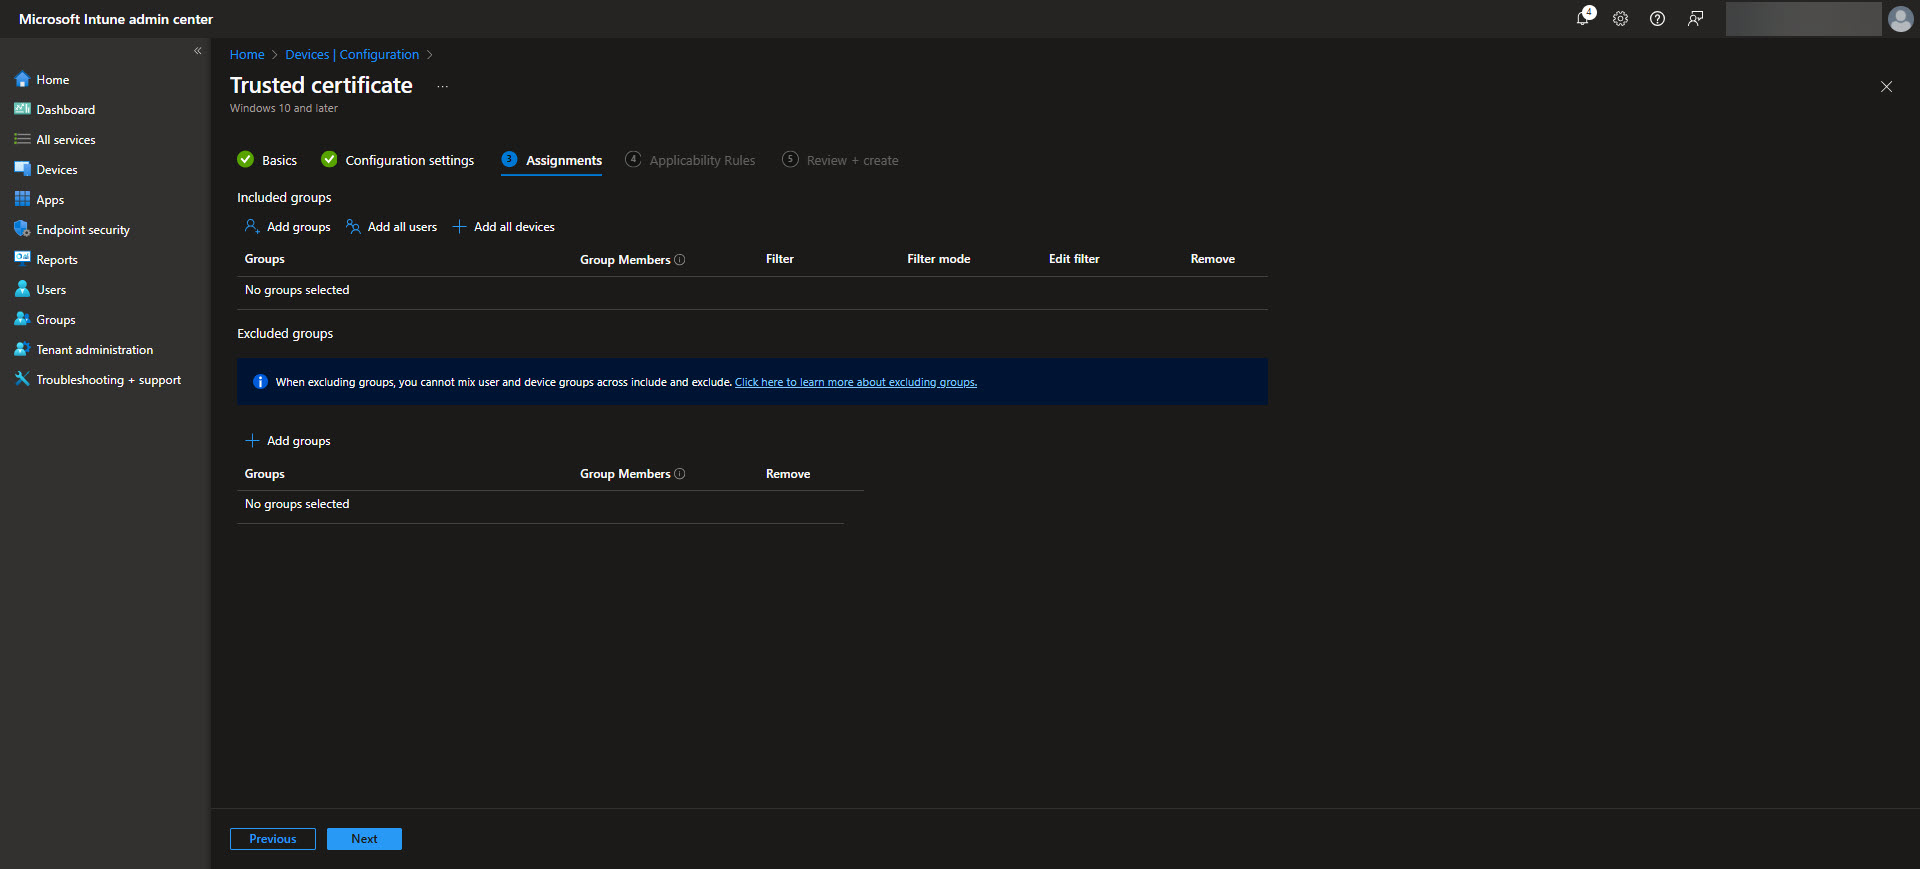
Repeat the process to create a second configuration profile for the Issuing CA. Similarly, upload the Issuing CA’s certificate file and assign it to the same device groups or additional groups as necessary. By deploying these trusted certificate profiles, you establish a trust chain on Windows devices, allowing them to recognize and trust certificates issued by the Cloud PKI infrastructure. These profiles are critical for ensuring secure communication and authentication within your environment.
Creating a Configuration Profile for Issuing SCEP Certificates
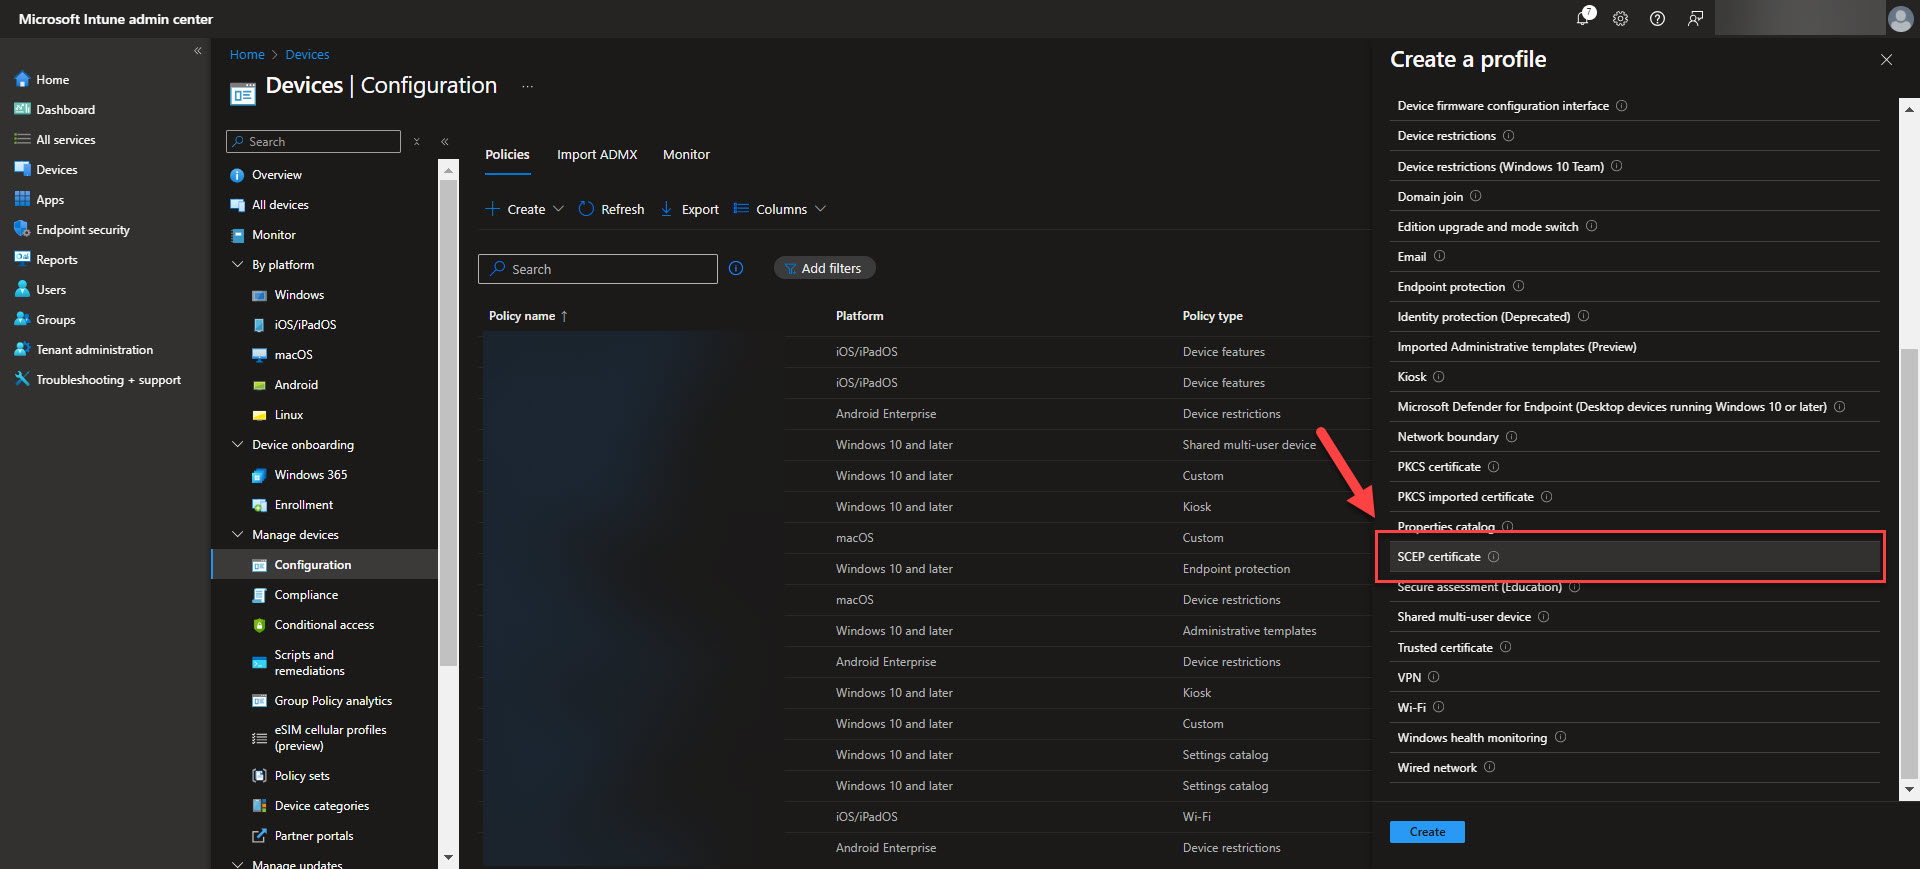
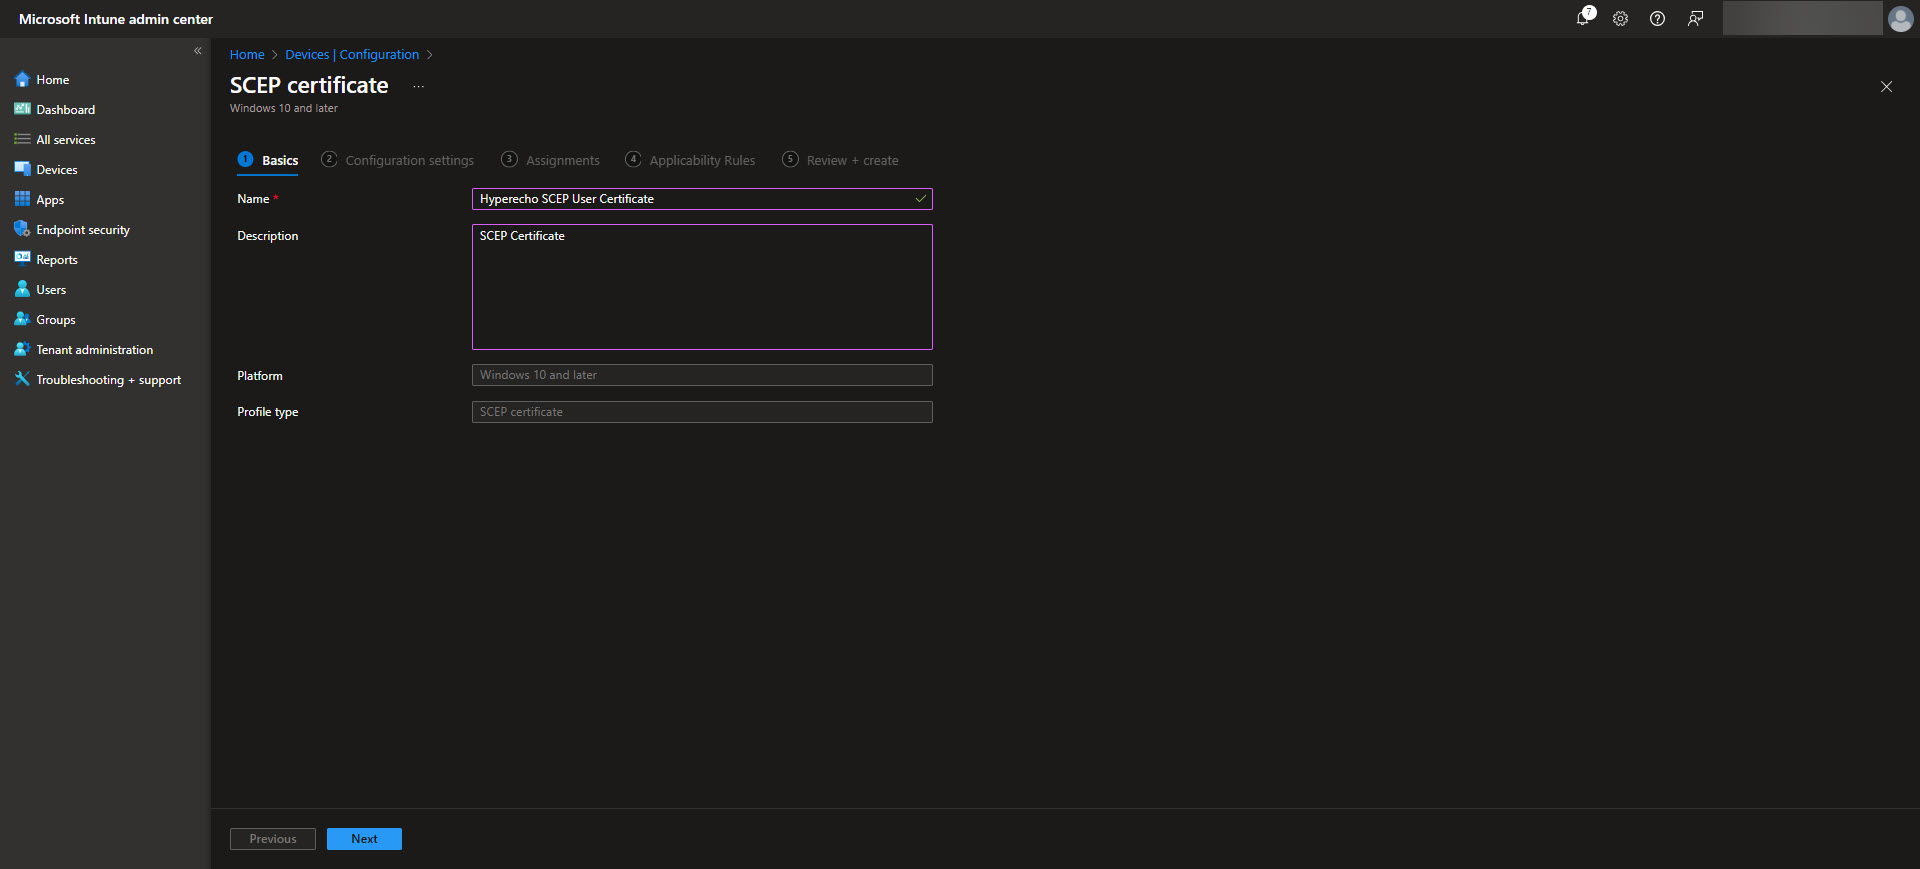
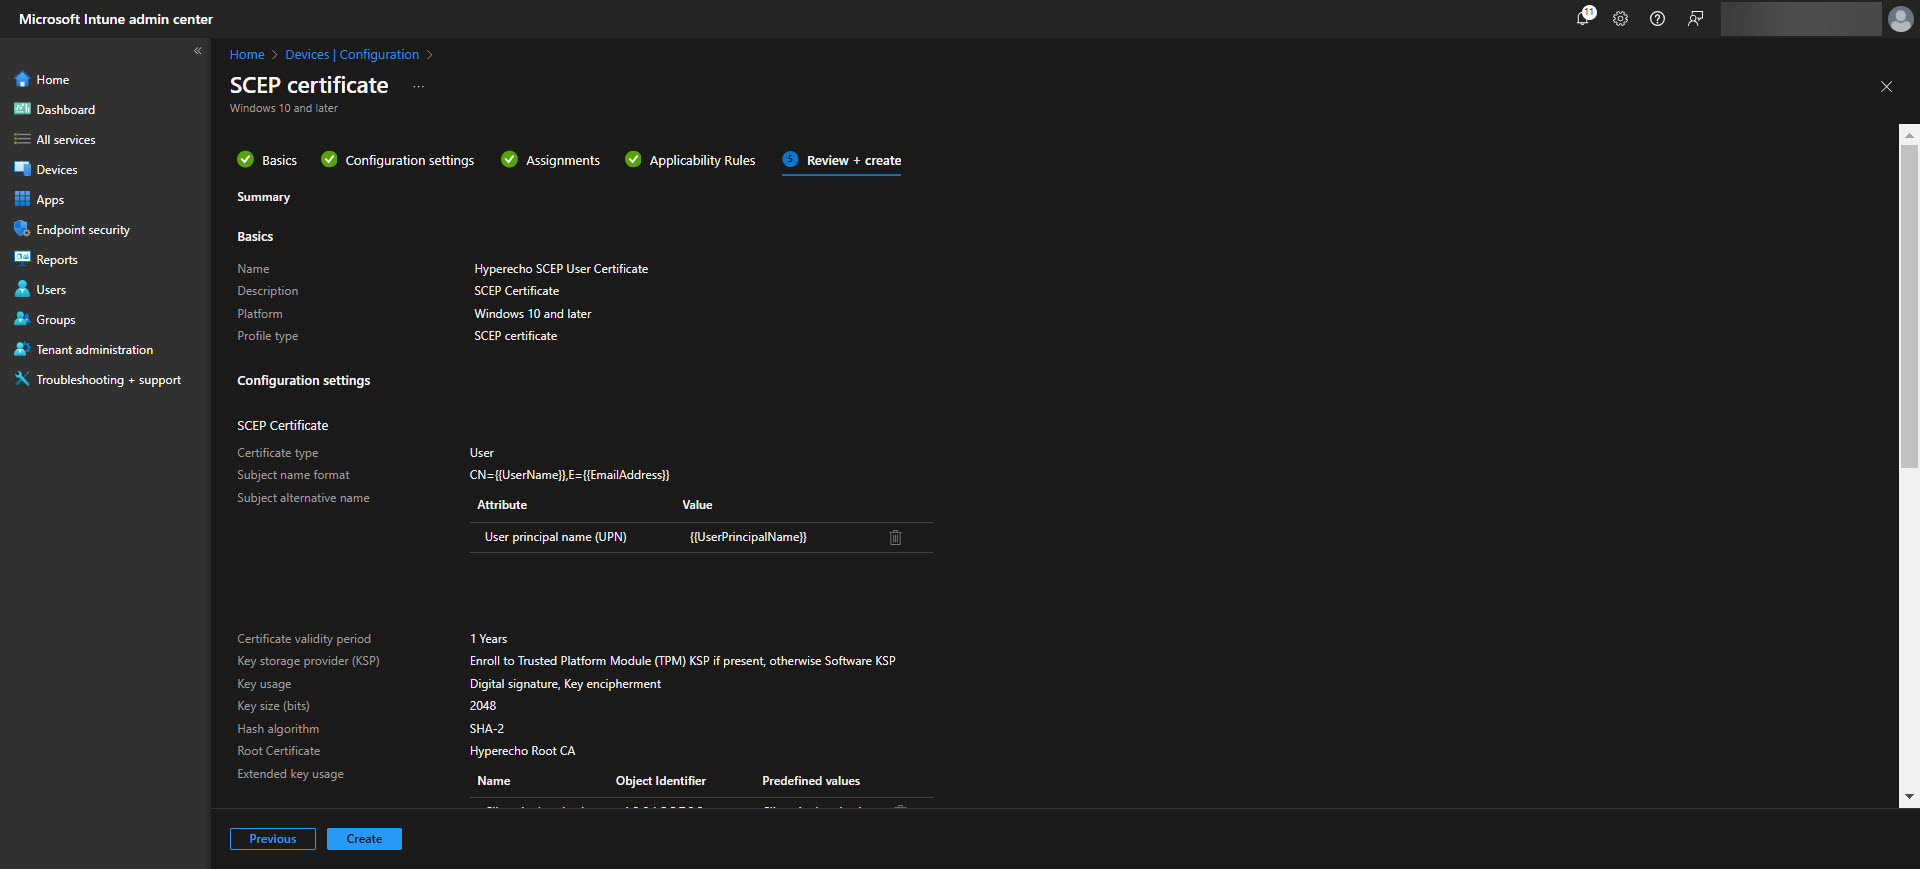
To deploy SCEP certificates using Intune, you need to create a configuration profile that defines how devices will request and receive certificates. Note that you will need to create a SCEP Cert profile for each of the Certificate Stores, that is the Device Cert store as well as the User Cert store depending on what you are needing. Start by navigating to Devices > Configuration profiles > Create profile in the Intune admin center. Select Windows 10 and later as the platform and choose SCEP certificate as the profile type. Provide a name and description for the profile to ensure clarity in your configuration settings.
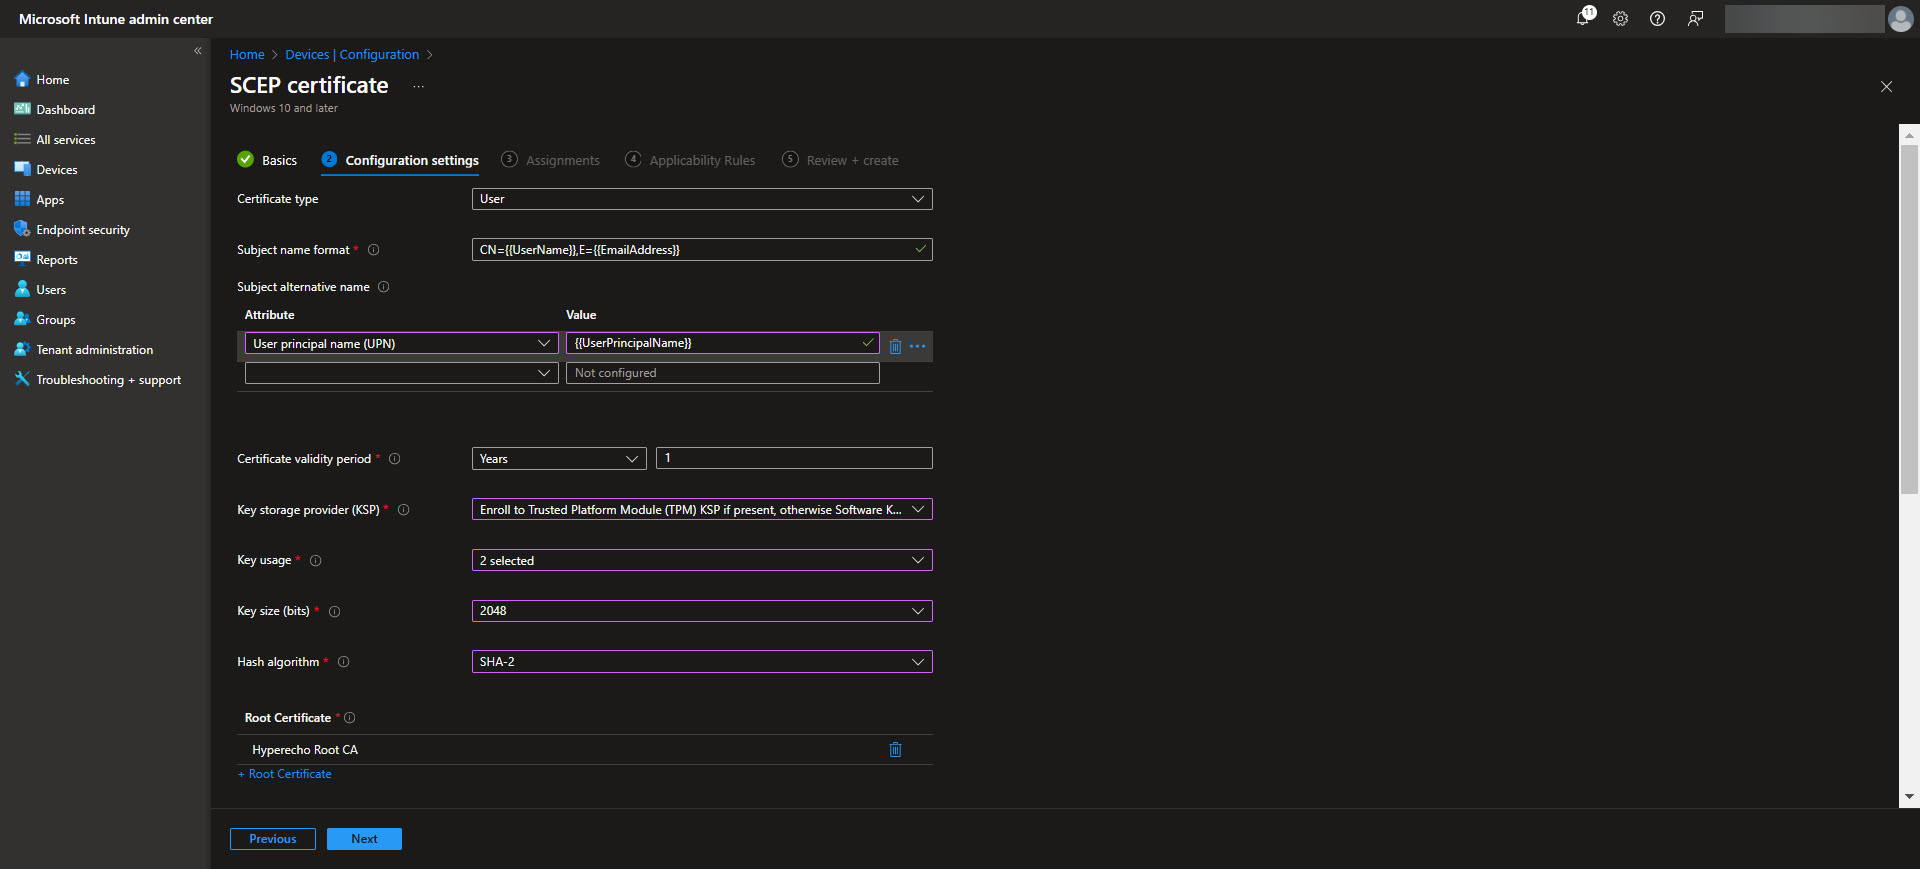
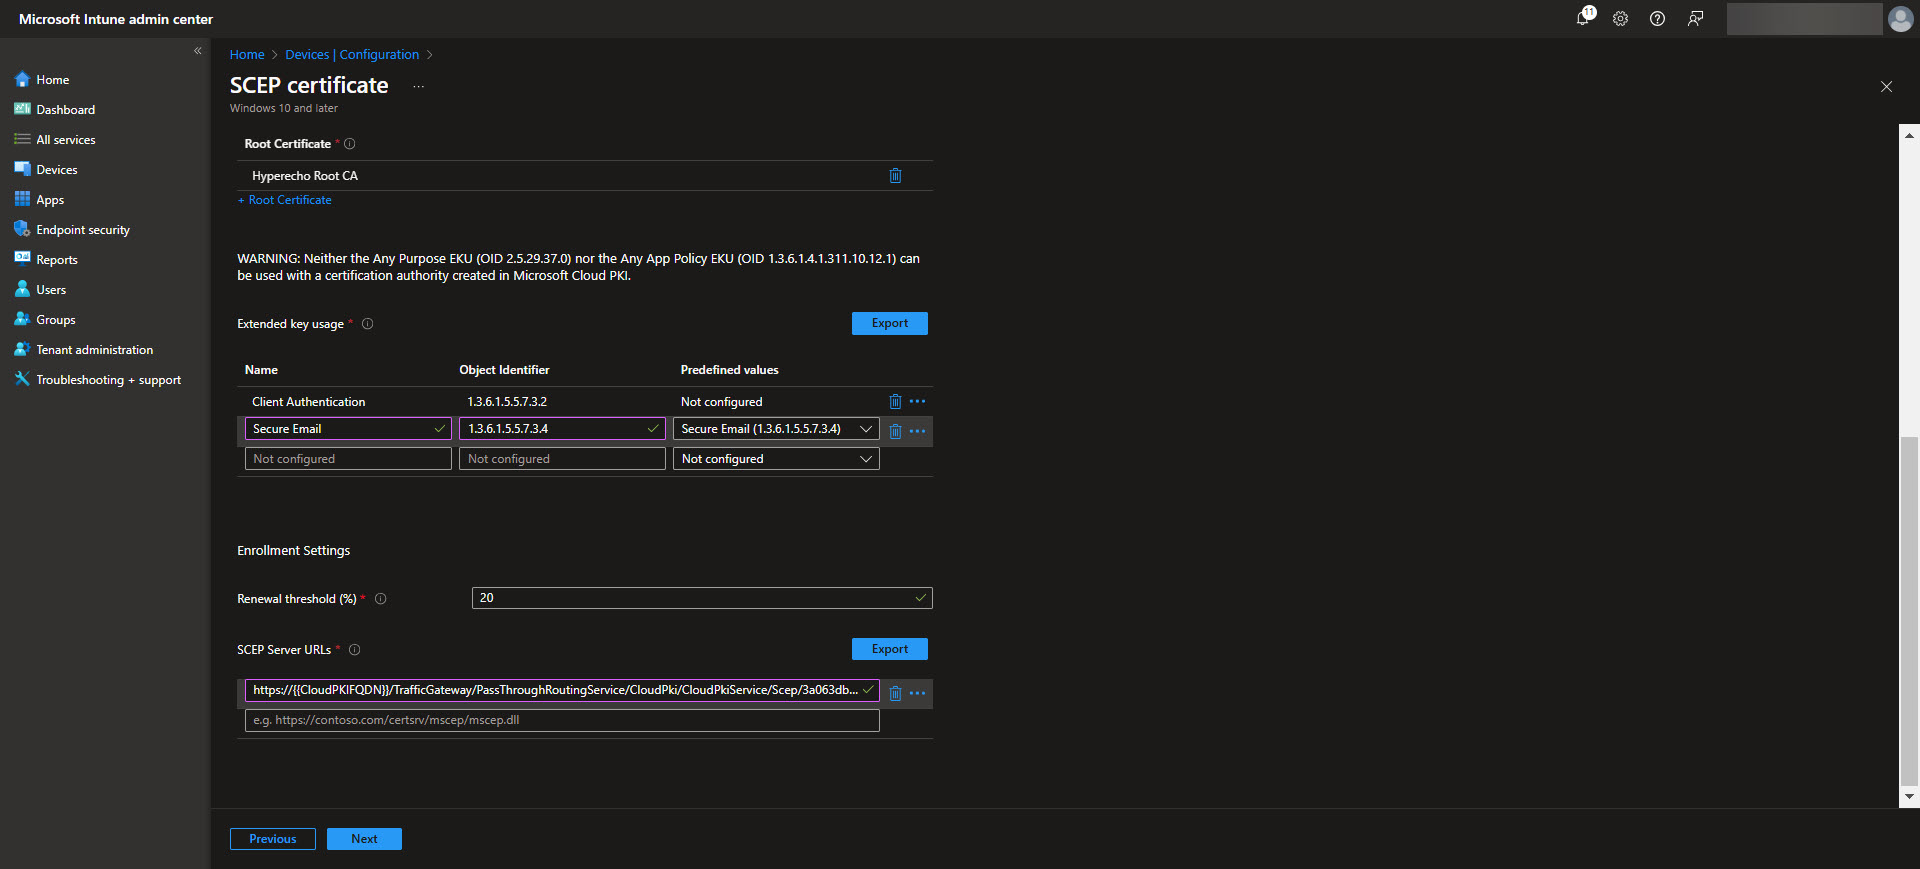
Next, configure the certificate settings. Specify the Certificate Type (User or Device) and the Subject name format, which changes depending on whether this is a User or Device certificate. There are specific placeholders that will fill in user or device specific identity information that can be used here. This will also be the default values that are used here. Likewise these same placeholders can be used for the SAN fields. Further elaboration on what placeholders can be used in the Subject and SAN fields are documented in the Intune SCEP certificate profile documentation. Define the Certificate validity period, Key storage provider, Key usage, Key size, and Hash algorithm to be used for these certificates ensuring they align with your security requirements. Then upload the Root CA that was downloaded when the Root CA was created. After the Root CA is uploaded select what EKUs that the certificate will be used for. Next, determine when the renewal threshhold will be for the certificates. The recommended renewal threshold is after 80% of the validity period of the certificate, which means we would want to leave 20%. After this period the device can request a new certificate to be issued from Intune. Lastly, provide the SCEP Server URL which can be found on the Issuing CA properties page in the Cloud PKI CA’s page.
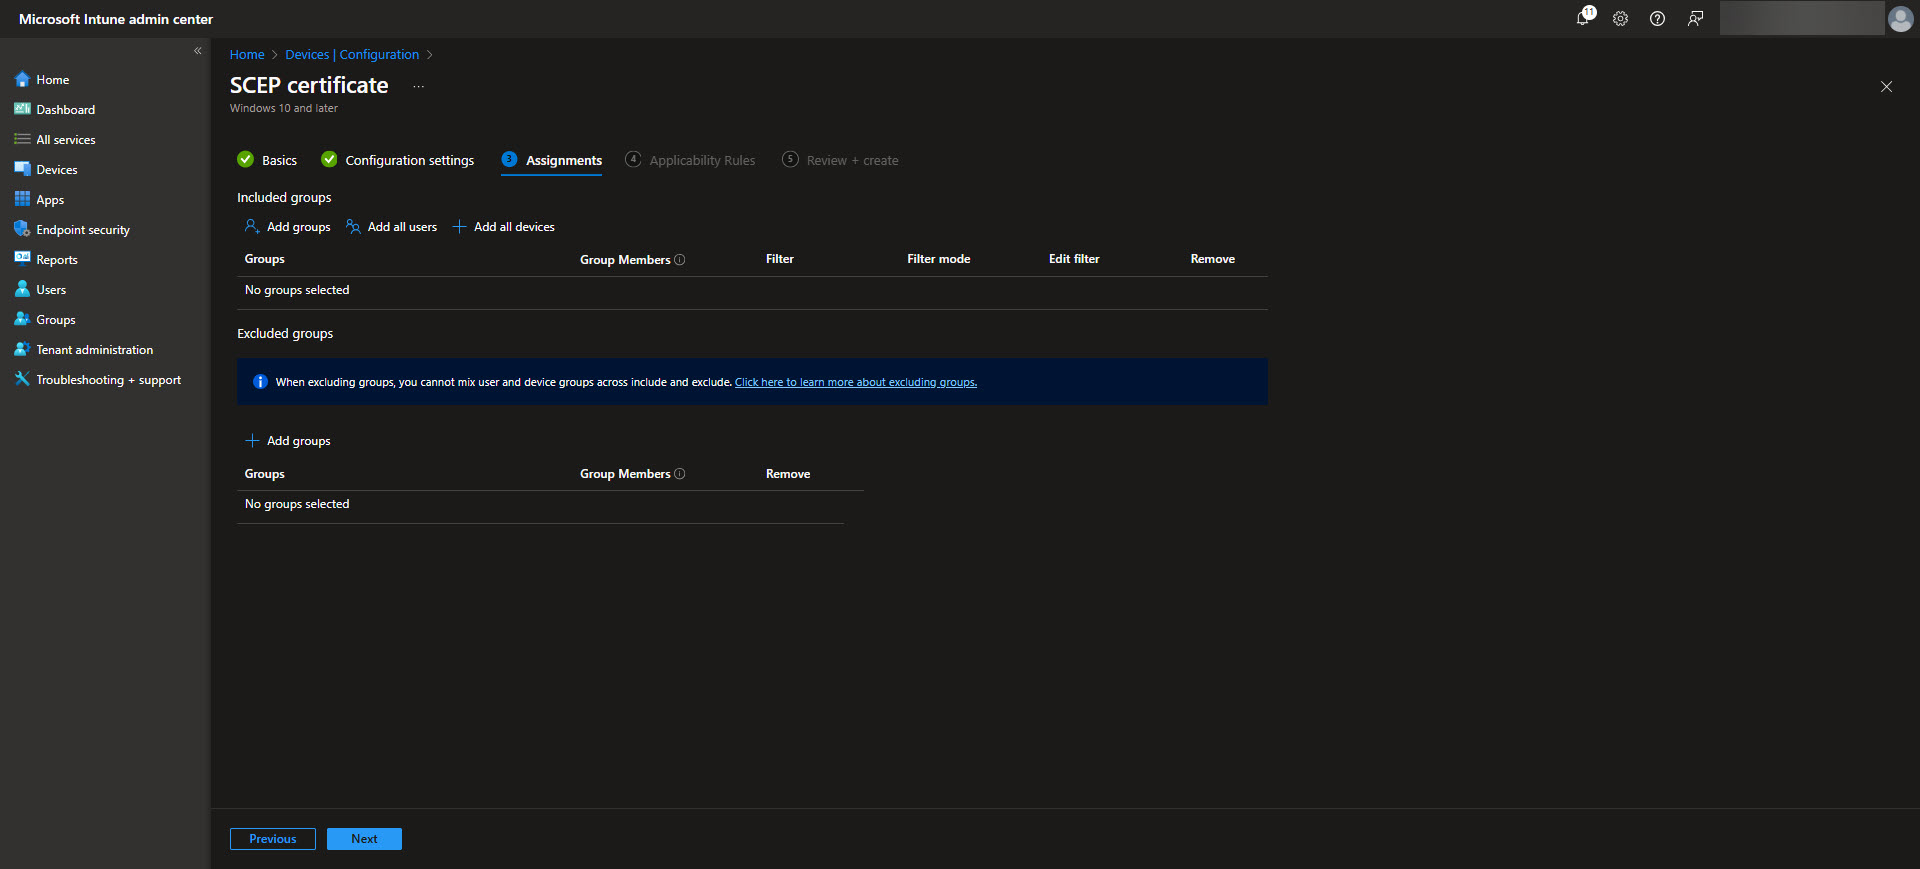
Assign the SCEP profile to the appropriate device groups. This ensures that only authorized devices can request and receive certificates. Once deployed, Intune will automatically manage the certificate provisioning process, streamlining secure access and authentication for your devices.
Conclusion
In this article, we’ve walked through the step-by-step process of deploying Intune’s Cloud PKI solution, starting with the creation of a Root CA and Issuing CA, followed by the deployment of trusted certificates, and concluding with the configuration of SCEP profiles for efficient certificate issuance. These steps ensure a seamless and secure certificate lifecycle management process that integrates smoothly with modern IT environments. By following these instructions, organizations can establish a robust and scalable PKI infrastructure that supports both managed and unmanaged devices.
Certificates play a critical role in today’s IT infrastructure, underpinning secure communication, authentication, and data integrity. Modernizing certificate management through Intune’s Cloud PKI simplifies the deployment process, reduces administrative overhead, and enhances security. This approach empowers IT professionals to focus on strategic initiatives while minimizing vulnerabilities and ensuring streamlined, efficient device management in a rapidly evolving technological landscape. Changes


